What are we building?
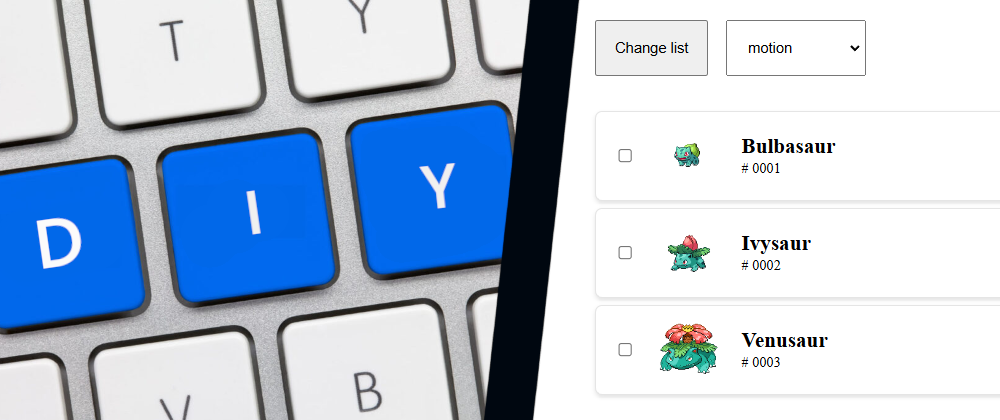
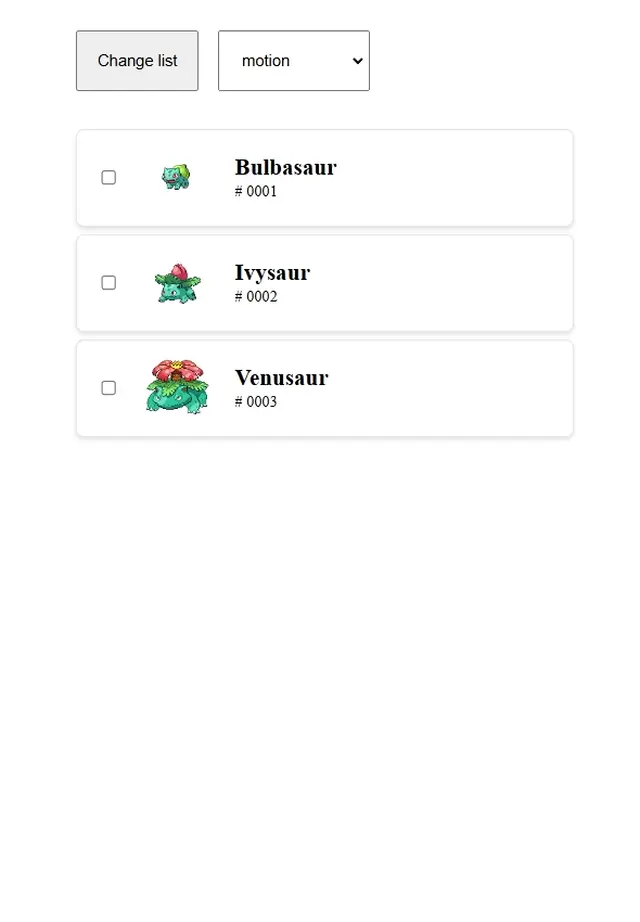
We are creating an animated list component. It will take an array of IDs and a renderItem function as props. The component arranges items in a row on large screens and in a column on smaller screens. When the list updates, it animates items to their new positions, fades in new items, and fades out removed ones.
This component is easy to implement with the Motion package. Here’s how we could do it:
import { ReactNode } from "react";
import { AnimatePresence, motion } from "motion/react";
import "@/List/list.css";

type ListItemId = number | string;

type ListProps<IdType extends ListItemId> = {
  ids: IdType[];
  renderItem: (id: IdType) => ReactNode;
};

export function List<IdType extends ListItemId>({
  ids,
  renderItem,
}: ListProps<IdType>) {
  return (
    <div className="list-root">
      <AnimatePresence>
        {ids.map((id) => (
          <motion.div
            layout
            key={id}
            initial={{ opacity: 0, transition: { duration: 0.3 } }}
            exit={{ opacity: 0, transition: { duration: 0.3 } }}
            animate={{ opacity: 1, transition: { duration: 0.2 } }}
            transition={{ duration: 0.2 }}
          >
            {renderItem(id)}
          </motion.div>
        ))}
      </AnimatePresence>
    </div>
  );
}
Before implementing our own version, we should prepare the following:
- copy the list component into a new folder and replace the
<motion.div>elements with regular<div>elements for now. - create a card component. In this tutorial we will displays Pokémons based on their IDs, using the pokedex npm package.
- set up an example page where we can switch between the Motion version and our implementation or show both side by side.
- create hardcoded ID arrays for updating the lists.
You can view the full code here: https://github.com/qwerjoe/blog-diy-animated-list/tree/start
Design decisions
Before we start coding, we need to make some important choices
What do we mean by layout change?
In this project, by layout we only refer to the 2D (x, y) positions of elements. We will ignore their size.
There are two common ways to get an element’s position:
-
offsetLeft/offsetTop– these values are relative to the element’s parent (offsetParent). They ignore extra CSS transformations. -
getBoundingClientRect()– returns values relative to the viewport and includes transformations like scaling or translation.
For our specific use case, offsetLeft / offsetTop is clearly the better choice.
- Being relative to the viewport doesn’t offer any advantage here.
- Being relative to the parent actually makes sense — if the parent moves, we don’t want to treat it as a layout change for the child element.
-
offsetLeft/offsetTopignores extra transformations, which is a big plus. Since we’ll animate these elements, usinggetBoundingClientRect()would require negating our own transformation effects just to detect layout changes correctly.
Which layout changes do we want to animate?
Let's think about when offsetLeft / offsetTop might change:
- React updates that modify the DOM.
- resizing the window or a parent component (e.g.,
flex-wrapmoves an item to a new row) - style changes (caused by explicit attribute changes or media queries or changing the element hierarchy).
- external scripts modifying the DOM.
Should we animate the change in every scenario? NO! (short answer)
Longer answer: It’s a business decision.
Technically, we could run a requestAnimationFrame loop to detect every offset change (while triggering layout recalculations on every frame, and causing performance issues). There might be use cases where this trade-off is justified, in ours it's definitely not.
In our case, we only want to animate layout changes when a React state update causes our component to re-render. In all other cases, elements will instantly move to their new position without any animation.

How to Animate?
There are several ways to animate elements:
- CSS transition animations
- CSS keyframe animations
-
Element.animate()(JavaScript API) - manual property animations using React state
- manual property animations outside of React
Why not CSS animations?
CSS keyframe animations could be useful for a somewhat customizable animation set, but with the level of control we need, predefining every animation in a stylesheet before playing it isn’t practical.
CSS transitions could work, but they can be tedious to manage as there’s only one transition property. If you need different durations or easing functions for different animations (enter, exit, etc.), you must carefully keep them in sync.
Also, if an animation needs to start from a value other than the element’s current state, you have to unset the transition property, set the starting value, then after a small delay reapply the transition before updating to the target value.
And if you ever want to add more complex animations, simple transitions won’t be enough.
Why not manually animate properties?
Manually updating property values gives you full control and allows any kind of animation behavior. But it's by far the most complex solution.
Motion internally uses this method to support both HTML and 3D object animations and to implement their physics-based spring interpolations. For our simplistic use case though, this would be an overkill.
Anyways if you ever need to implement custom animations, never rely on React state. Keep in mind that React state changes will trigger re-renders that might affect the entire application tree, while smooth animations require updates every 33.3ms (30 FPS). A React re-render could block or delay these updates, causing janky animations.
Our Pick: JavaScript API
The Element.animate() function comes with all the benefits of CSS keyframe animations but we can configure and manage everything from code. The composite and fill options, along with the ability to commit styles, will help when blending multiple animations modifying the same property.
However, blending animations can still be tricky with this approach. If it becomes a problem later, our only alternative would be to implement custom manual animations.
Implementation

The core logic will be handled in the AnimNode class, which will be responsible for starting and managing animations. The <AnimDiv> component will be our version of the <motion.div> component. These two will be connected by the useAnimNode hook.
Let's begin by writing some code for the AnimNode class.
export class AnimNode {
  private isMounted: boolean = false;
  private domElement?: HTMLElement | null;
  private animations: Set<Animation> = new Set();

  setDomElement(element: HTMLElement | null) {
    this.domElement = element;
  }

  private registerAnimation(animation: Animation) {
    this.animations.add(animation);

    const removeAnimation = this.removeAnimation.bind(this, animation);
    animation.addEventListener("finish", removeAnimation);
    animation.addEventListener("cancel", removeAnimation);
    animation.addEventListener("remove", removeAnimation);
  }

  private removeAnimation(animation: Animation) {
    animation.cancel();
    this.animations.delete(animation);
  }

  mount() {
    this.isMounted = true;

    if (!this.domElement) {
      throw new Error("AnimNode: mounting without a dom element");
    }
  }

  unmount() {
    this.isMounted = false;
    for (const animation of this.animations.values()) {
      animation.cancel();
    }
    this.animations.clear();
  }
}
It doesn’t do anything yet. You can set the DOM element it will control, we added some utility methods to track active animations and implemented basic mount / unmount lifecycle methods.
Now, the interesting part: how will we detect layout changes? We'll create two functions: one to run before the layout might change, and another to run after. In the first function, we'll save the layout values. In the second one, we'll compare the saved and the new values and trigger a layout animation if they are different.
type LayoutProperties = {
  top: number;
  left: number;
};

function calcLayoutProperties(element: HTMLElement): LayoutProperties {
  return {
    left: element.offsetLeft,
    top: element.offsetTop,
  };
}

function hasLayoutChanged(prev: LayoutProperties, current: LayoutProperties) {
  return prev.left !== current.left || prev.top !== current.top;
}

export class AnimNode {
  private prevLayout?: LayoutProperties;

  ...

  beforeUpdate() {
    if (this.domElement && this.isMounted) {
      this.prevLayout = calcLayoutProperties(this.domElement);
    }
  }

  afterUpdate() {
    if (!this.domElement || !this.isMounted) {
      return;
    }

    if (!this.prevLayout) {
      // first update
      return;
    }

    const layout = calcLayoutProperties(this.domElement);
    if (hasLayoutChanged(this.prevLayout, layout)) {
      this.handleLayoutChange(this.prevLayout, layout);
    }
  }

  private handleLayoutChange(
    prevLayout: LayoutProperties,
    layout: LayoutProperties,
  ) {
    if (!this.domElement) {
      return;
    }

    const delta = {
      top: prevLayout.top - layout.top,
      left: prevLayout.left - layout.left,
    };

    const translateFrom = `${delta.left}px ${delta.top}px`;
    const translateTo = "0px 0px";

    const animation = this.domElement.animate(
      [{ translate: translateFrom}, { translate: translateTo }],
      {
        duration: 200,
        easing: 'ease-out',
        composite: "add",
        fill: "both",
      },
    );

    this.registerAnimation(animation);
  }

  ...

}
In the handleLayoutChange method, we'll calculate the vector that points from the new position to the old position. The animation will move from these values to (0, 0).
For the fill option, we use 'both', which will immediately set the starting value on the element, making it look like it's still in the "old" position.
The 'add' composite option is for handling concurrent layout animations. Since our layout animation target is always (0, 0), we can combine these animations by adding their values together. Using 'replace' would cause a noticeable jump when a layout animation starts while others are still active.
Now, all that's left is to implement AnimDiv and useAnimNode.
We'll call the beforeUpdate method directly in the function body, which runs when the function component updates / re-renders. The afterUpdate method will be called inside a useLayoutEffect, which runs synchronously right after the DOM is updated.
import { ComponentProps, useLayoutEffect, useRef } from "react";
import { AnimNode } from "./AnimNode";

export type AnimDivProps = ComponentProps<"div">;

export function AnimDiv({ ...divProps }: AnimDivProps) {
  const { domRef } = useAnimNode();
  return <div {...divProps} ref={domRef} />;
}

function useAnimNode() {
  const animNodeRef = useRef<AnimNode>(new AnimNode());
  const animNode = animNodeRef.current;

  animNode.beforeUpdate();

  useLayoutEffect(() => {
    animNode.mount();
    return () => {
      animNode.unmount();
    };
  }, []);

  useLayoutEffect(() => {
    animNode.afterUpdate();
  }, undefined);

  return {
    animNode,
    domRef: (el: HTMLDivElement) => {
      animNode.setDomElement(el);
    },
  };
}
This is necessary because if we used useEffect, React could give
the control back to the browser after updating the DOM. At that point, the browser might repaint the page before running the effect, causing a visual glitch where the element jumps to its new position then jumps back and starts moving.
useLayoutEffect prevents this issue, but it's important to keep it lightweight and avoid updating React state within it, as that could trigger unintended side effects.
Now our animated layout updates work seamlessly with React state changes. We can even add a simple hack to create hardcoded enter animations:
  afterUpdate() {
    if (!this.domElement || !this.isMounted) {
      return;
    }

    if (!this.prevLayout) {
      // first update -- fade in object
      const animation = this.domElement.animate(
        [{ opacity: 0 }, { opacity: 1 }],
        {
          duration: kGlobalAnimationOptions.duration,
          easing: kGlobalAnimationOptions.easing,
          composite: "replace",
          fill: "both",
        },
      );

      this.registerAnimation(animation);
    }

    const layout = calcLayoutProperties(this.domElement);
    if (this.prevLayout && hasLayoutChanged(this.prevLayout, layout)) {
      this.handleLayoutChange(this.prevLayout, layout);
    }
  }
You can view the full code here: https://github.com/qwerjoe/blog-diy-animated-list/tree/hardcoded-animations
What’s Next?
If this is all you need, then we’re done! In fact, we could even simplify the code by merging AnimNode into the useAnimNode hook. But if you want more - like customizable enter/exit animations - keep reading because the next parts of this tutorial will cover these topics.
Thanks for reading!


Top comments (1)
Could you elaborate on the performance implications of using useLayoutEffect for handling animations in rapid state updates, and what potential pitfalls should developers be aware of?