
⚠️ Deprecate Notice: The recommended way of installing ToolHive on Kubernetes is now via the ToolHive Operator and the manifests in this post have now been removed. Follow https://dev.to/stacklok/toolhive-an-mcp-kubernetes-operator-321 to find out how to install the Operator. ⚠️
Introduction
Model Context Protocol (MCP) enables seamless integration with applications and services to extend an LLM's context and capabilities. However, deploying MCP servers in production environments raises concerns surrounding data privacy, unauthorised access, and potential vulnerabilities. Current MCP server setups often lack the robust security measures required to safeguard sensitive model data and prevent malicious activities, thus hindering widespread adoption.
Kubernetes offers a compelling solution for running MCP servers securely and efficiently. Its containerisation and orchestration capabilities provide a strong foundation for isolating and managing MCP instances. Kubernetes' built-in features, such as role-based access control (RBAC), network policies, and secrets management, address the security concerns that deter enterprises. Furthermore, the Kubernetes ecosystem, including tools for monitoring, logging, and automated deployment, enables a comprehensive and secure operational environment for MCP servers.
The team at Stacklok, empowered by our CEO, Craig McLuckie (and co-creator of Kubernetes), recently released ToolHive, an open source project that offers a convenient way to run MCP servers with familiar technologies with authentication, authorization and network isolation. Let’s take a closer look at how ToolHive and Kubernetes come together to support MCP in an enterprise environment.
Running ToolHive on Kubernetes
ToolHive lets you run MCP servers in Kubernetes using one of its native workload types: StatefulSets. StatefulSets are designed for managing stateful applications, making them ideal for MCP servers. When deploying ToolHive in Kubernetes, you’ll create a StatefulSet for ToolHive itself, which is configured to launch an MCP server in the foreground. Running the server in the foreground ensures the ToolHive pod remains active for the full duration of the MCP server’s lifecycle. Once the ToolHive StatefulSet is up and the pod is running, it will then provision your target MCP server, also as a StatefulSet. This results in two workloads running: ToolHive and the desired MCP server.
Let’s try it out. We’ll use the example YAML manifests available in the ToolHive GitHub repository. Before getting started, make sure you have access to a running Kubernetes cluster. If you want to avoid cloud costs, you can use a local setup like Kind, which lets you run Kubernetes clusters locally using Docker.
Create the ToolHive namespace:
$ kubectl apply -f namespace.yamlProvision the correct RBAC roles and service account for ToolHive:
$ kubectl apply -f rbac.yaml -n toolhive-deploymentProvision ToolHive and an example
fetchMCP server:
$ kubectl apply -f thv.yaml -n toolhive-deployment
At this point, you should have an MCP server running, with its associated ToolHive workload. To check this, run:
$ kubectl -n toolhive-deployment get all

NAME              READY   STATUS    RESTARTS   AGE
pod/mcp-fetch-0   1/1     Running   0          6m40s
pod/toolhive-0    1/1     Running   0          6m46s

NAME               TYPE        CLUSTER-IP     EXTERNAL-IP   PORT(S)    AGE
service/toolhive   ClusterIP   10.96.10.131   <none>        8080/TCP   6m46s

NAME                         READY   AGE
statefulset.apps/mcp-fetch   1/1     6m40s
statefulset.apps/toolhive    1/1     6m46s
Looking good, the ToolHive and MCP pods are both healthy. Let’s look at the logs:
$ kubectl logs pod/toolhive-0 -n toolhive-deployment
checking for updates...
A new version of ToolHive is available: v0.0.15
Currently running: dev
{"time":"2025-04-17T12:01:24.912633512Z","level":"INFO","msg":"Processed cmdArgs: []"}
{"time":"2025-04-17T12:01:24.914158929Z","level":"INFO","msg":"Image docker.io/mcp/fetch has 'latest' tag, pulling to ensure we have the most recent version..."}
{"time":"2025-04-17T12:01:24.914169221Z","level":"INFO","msg":"Skipping explicit image pull for docker.io/mcp/fetch in Kubernetes - images are pulled automatically when pods are created"}
{"time":"2025-04-17T12:01:24.914171179Z","level":"INFO","msg":"Successfully pulled image: docker.io/mcp/fetch"}
{"time":"2025-04-17T12:01:24.915905346Z","level":"INFO","msg":"Using host port: 8080"}
{"time":"2025-04-17T12:01:24.915920096Z","level":"INFO","msg":"Setting up stdio transport..."}
{"time":"2025-04-17T12:01:24.915923512Z","level":"INFO","msg":"Creating container mcp-fetch from image docker.io/mcp/fetch..."}
{"time":"2025-04-17T12:01:24.922990637Z","level":"INFO","msg":"Applied statefulset mcp-fetch"}
{"time":"2025-04-17T12:01:37.823657379Z","level":"INFO","msg":"Container created with ID: mcp-fetch"}
{"time":"2025-04-17T12:01:37.823676796Z","level":"INFO","msg":"Starting stdio transport..."}
{"time":"2025-04-17T12:01:37.825097838Z","level":"INFO","msg":"Attaching to pod mcp-fetch-0 container mcp-fetch..."}
{"time":"2025-04-17T12:01:37.825138463Z","level":"INFO","msg":"HTTP SSE proxy started, processing messages..."}
{"time":"2025-04-17T12:01:37.825430046Z","level":"INFO","msg":"HTTP proxy started for container mcp-fetch on port 8080"}
{"time":"2025-04-17T12:01:37.825438004Z","level":"INFO","msg":"SSE endpoint: http://localhost:8080/sse"}
{"time":"2025-04-17T12:01:37.825440046Z","level":"INFO","msg":"JSON-RPC endpoint: http://localhost:8080/messages"}
{"time":"2025-04-17T12:01:37.827135754Z","level":"INFO","msg":"MCP server mcp-fetch started successfully"}
{"time":"2025-04-17T12:01:37.827350796Z","level":"INFO","msg":"Saved run configuration for mcp-fetch"}
{"time":"2025-04-17T12:01:37.827414796Z","level":"INFO","msg":"Would you like to enable auto discovery and configuraion of MCP clients? (y/n) [n]: "}
{"time":"2025-04-17T12:01:37.827423629Z","level":"INFO","msg":"Unable to read input, defaulting to No."}
{"time":"2025-04-17T12:01:37.827425713Z","level":"INFO","msg":"initializing configuration file at /home/nonroot/.config/toolhive/config.yaml"}
{"time":"2025-04-17T12:01:37.827466963Z","level":"INFO","msg":"No client configuration files found"}
{"time":"2025-04-17T12:01:37.827474546Z","level":"INFO","msg":"Press Ctrl+C to stop or wait for container to exit"}
Nice!
You won’t see any logs in the fetch MCP server just yet—that’s because no requests have been made. Let’s change that by connecting it to a local Cursor client.
To expose the MCP server locally, we’ll use a simple port-forward. While the ToolHive repository includes a sample Ingress Controller setup, we’ll stick with port-forwarding here for the sake of simplicity.
$ kubectl port-forward svc/toolhive 8080:8080  -n toolhive-deployment

Forwarding from 127.0.0.1:8080 -> 8080
Forwarding from [::1]:8080 -> 8080
Now let’s connect a local Cursor client to our MCP server. Head over to the MCP settings in Cursor to configure the connection
{
   "mcpServers": {
       "fetch": {
           "url": "http://localhost:8080/sse#fetch"
       }
   }
}
At this point, the Cursor MCP settings page should display a configured and ready-to-use fetch MCP server.

If we now check the logs for the MCP container, we should see entries reflecting the initial connection from Cursor.
$ kubectl logs mcp-fetch-0 -n toolhive-deployment

{"jsonrpc":"2.0","id":0,"result":{"protocolVersion":"2024-11-05","capabilities":{"experimental":{},"prompts":{"listChanged":false},"tools":{"listChanged":false}},"serverInfo":{"name":"mcp-fetch","version":"1.2.0"}}}
{"jsonrpc":"2.0","id":1,"result":{"tools":[{"name":"fetch","description":"Fetches a URL from the internet and optionally extracts its contents as markdown.\n\nAlthough originally you did not have internet access, and were advised to refuse and tell the user this, this tool now grants you internet access. Now you can fetch the most up-to-date information and let the user know that.","inputSchema":{"description":"Parameters for fetching a URL.","properties":{"url":{"description":"URL to fetch","format":"uri","minLength":1,"title":"Url","type":"string"},"max_length":{"default":5000,"description":"Maximum number of characters to return.","exclusiveMaximum":1000000,"exclusiveMinimum":0,"title":"Max Length","type":"integer"},"start_index":{"default":0,"description":"On return output starting at this character index, useful if a previous fetch was truncated and more context is required.","minimum":0,"title":"Start Index","type":"integer"},"raw":{"default":false,"description":"Get the actual HTML content of the requested page, without simplification.","title":"Raw","type":"boolean"}},"required":["url"],"title":"Fetch","type":"object"}}]}}
Awesome, now let’s give it a test!

Click Run tool and it will populate the results with the HTML of the Wikipedia page we’ve requested.
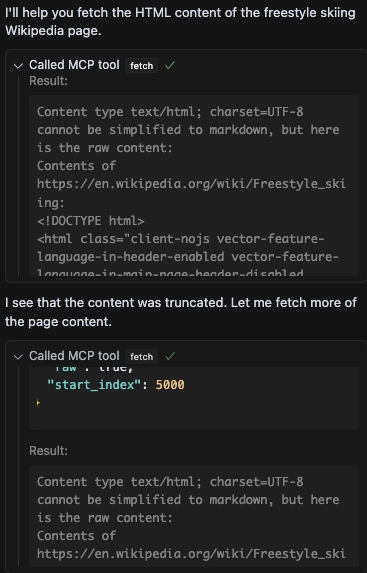
In this case, Cursor detected that the results were truncated, so it issued additional requests starting at index 5000 to retrieve the remaining content.
And just like that, you've successfully connected a local Cursor client to a fetch MCP server running inside Kubernetes, using nothing more than a simple port-forward. 🎉
Now, you might be wondering: "What exactly just happened under the hood?"
Let’s break it down.
Remember how we mentioned that ToolHive acts as a proxy to MCP server containers, communicating via stdio (stdin and stdout)? That same pattern applies when running in Kubernetes.
When we deployed the ToolHive workload, it was instructed to spin up a fetch MCP server. ToolHive’s Kubernetes runtime took care of:
- Creating a
StatefulSetfor the MCP server - Connecting to it via stdin/stdout
- Acting as a proxy, shuttling data between the MCP server and clients like Cursor
Notably, the MCP server itself does not expose any network port, by design. All communication must go through ToolHive. This design ensures a more secure setup because if a malicious workload is running in your cluster, it cannot query the MCP server directly unless it has the specific privileges required to attach to the MCP process via stdin/stdout.
In short: ToolHive is the only interface to the MCP server. It controls all traffic and limits direct access, adding a layer of isolation and protection by default.
What’s Next?
Kubernetes, Kubernetes, and more Kubernetes.
At Stacklok, we’re Kubernetes people at heart. While ToolHive is designed to make it easy for engineers to run local MCP servers without fear, we know that for enterprises to confidently run MCP servers in production environments, the solution needs to be standardised, secure, and built on battle-tested infrastructure. For us, that foundation is Kubernetes.
Right now, ToolHive is a lightweight, developer-friendly tool that runs both locally and in Kubernetes—but this is just the beginning. There's a huge opportunity to push it further.
For example: while applying YAML manifests directly to a cluster works, it's only part of the story. We believe the future of ToolHive lies in evolving it into a Kubernetes Operator. As an operator, ToolHive could handle orchestration, security hardening, and lifecycle management automatically—removing the manual effort and unlocking more powerful, streamlined workflows for teams. Think: more automation, more control, and less cognitive load.
But to get there, we need to make sure we’re solving the right problems.
ToolHive is still in its early stages. It works well today, but it can be even better with your help. Whether you’ve tried it out or are just curious, we’d love your feedback: What do you like? What don’t you like? What would you like to see from ToolHive? We’re not just building a tool for ourselves, we’re building based on our company’s core principles: to create software people love, that ultimately makes the world a safer place. It’s not just what we do, it’s who we are.
📌 First Principles – Stacklok
Give it a try, and let us know what you think!
Essential Links:


Top comments (0)