
In the previous article, we explored the installation of Presto. Building on that foundation, it's time to take your data exploration one step further by integrating Presto with Apache Zeppelin, a powerful web-based notebook that allows interactive data analytics.
Zeppelin provides an easy-to-use interface where you can write and execute SQL queries directly on Presto and visualise your data seamlessly. Whether you're a data engineer, data scientist, or developer, connecting Presto with Zeppelin opens the door to interactive data exploration, and stunning visualization's.
Pre-Requisites 🎯
Open JDK or Oracle JDK {1.8 (151+)}
OS (Mac/ Ubuntu)
I am using Apache Zeppelin version 0.11.2, because its compatible with JDK 1.8, you can get latest version if you have JDK 11 installed.
Step - 1: Install Apache Zeppelin 📥
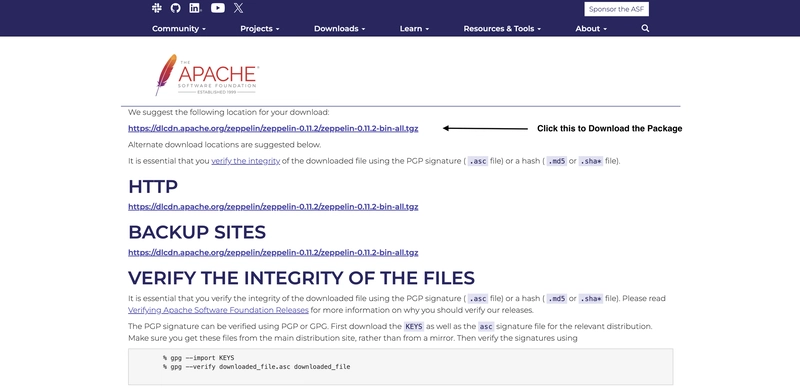
- Open below link in any browser (Chrome/ Safari/ Firefox). It will redirect to official Apache Zeppelin download page.
https://zeppelin.apache.org/download.html
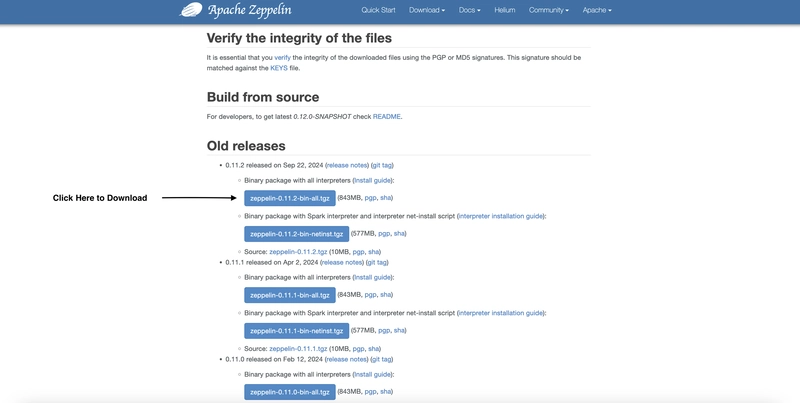
Create a directory at Desktop or any preferred location in your system and name it Zeppelin (or whatever you like). Move the downloaded package to the Zeppelin directory.
Open terminal/command line interface and navigate to your Zeppelin directory and run below command.
tar -xvzf zeppelin-*.tgz (replace * with your downloaded version)
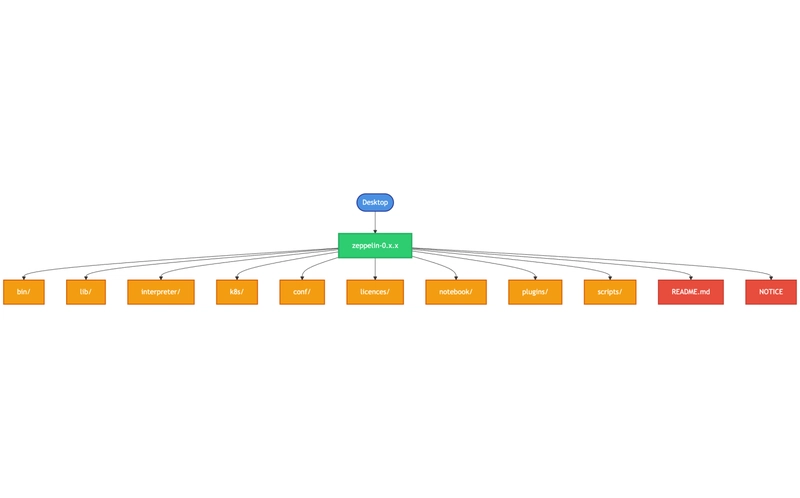
- It will create a directory like this: zeppelin-0.11.2-bin-all
Step -2 : Configure Apache Zeppelin ⚙️ 🔧
Apache Zeppelin uses default port 8080 and uses Hadoop or Spark at the time of start, so we have to configure it to run Zeppelin smoothly.

We can't use port 8080 for Zeppelin because its already in use by Presto server, so we will configure it for some other port, for example (8888).

Also, we are not using Hadoop or Spark at the moment, so we will disable it as well,(Optional if you are using Hadoop or Spark).
Navigate to conf directory inside zeppelin-0.11.2-bin-all. Inside conf directory, two files will be available named as zeppelin-env.sh.template and zeppelin-site.xml.template
Create a copy of both files and rename it to zeppelin-env.sh and zeppelin-site.xml respectively.
Open zeppelin-env.sh in any text editor or code editor (I prefer Visual Studio Code) and add below code in the last line. Save and close the file, after adding the code.
export USE_HADOOP= false
📌 This will disable the Hadoop configuration for Apache Zeppelin
- Now open zeppelin-site.xml file and look for below code.
<property>
  <name>zeppelin.server.port</name>
  <value>8080</value>
  <description>Server port.</description>
</property>
- Replace the port 8080 with any port which is available, in my case I have added 8888, save and close the file, after making changes in configuration.
<property>
  <name>zeppelin.server.port</name>
  <value>8888</value>
  <description>Server port.</description>
</property>
Now, we are all set 😎, Let's Go 🚀
Step - 3: Start Apache Zeppelin 🏁 🟢
Open terminal/command line interface and navigate to zeppelin-0.11.2-bin-all directory.
Run below command to start Apache Zeppelin.
bin/zeppelin-daemon.sh start
- As soon as you will hit the command, Apache Zeppelin will be started and it will be accessible on localhost:8888

- To check the status of Apache Zeppelin 🔎
bin/zeppelin-daemon.sh status
- To stop the Apache Zeppelin 🔴
bin/zeppelin-daemon.sh stop
Step - 4: Connecting Apache Zeppelin to Presto 🔗
To connect Zeppelin to Presto, we need Presto JDBC driver.
Open below link in any browser (Chrome/ Safari/ Firefox) and download the Presto JDBC driver.
https://prestodb.io/getting-started/

Once you click download, presto-jdbc-0.291.jar file will be downloaded.
You need to move this jar file to the below directory.
Desktop/ Zeppelin/ zeppelin-0.11.2-bin-all/ interpreter/ jdbc/
- Restart Zeppelin to load the driver 🔄
bin/zeppelin-daemon.sh restart
Step - 5 : Create Presto Interpreter in Zeppelin 🔀
Open browser and go to localhost:8888
Click on Interpreter tab at the top right of the page.

- Click on + Create in the top right corner
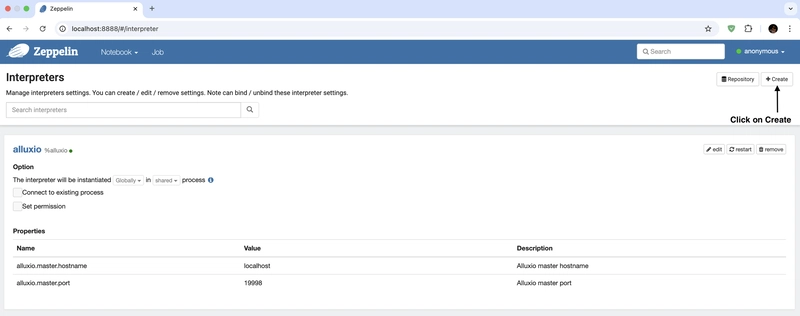
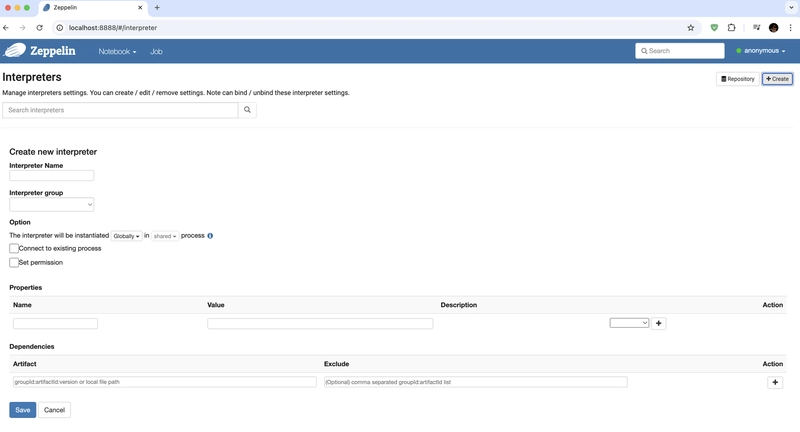
- Fill the following details under Create new Interpreter
📌 Interpreter Name: presto
📌 Interpreter group: jdbc
- Let's configure JDBC properties for Presto
📌 default.url -> jdbc:presto://localhost:8080/mysql/default
📌 default.user -> presto
📌 default.driver -> com.facebook.presto.jdbc.PrestoDriver
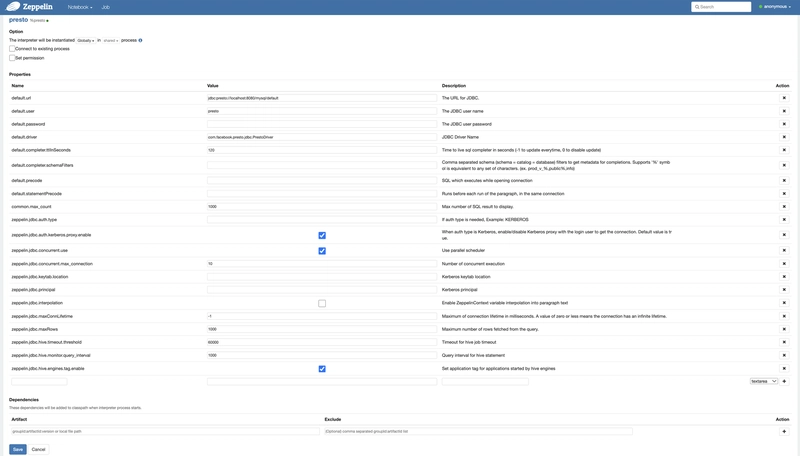
Save the configuration and we are good to go.
Restart Apache Zeppelin to reload the interpreter 🔄
bin/zeppelin-daemon.sh restart
Step - 6: Now It's showtime, Run SQL Queries 🔥
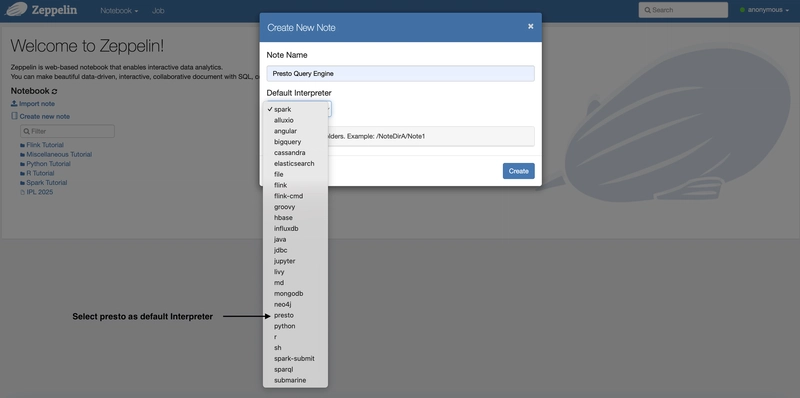
- Click on Notebook from Zeppelin dashboard and Create new Note.

Name the note anything you like (Presto Query Engine).
Select presto from the drop down list for Default Interpreter.
- Add the following line to the first paragraph of the notebook to establish the connection.
%presto
- Run Basic SQL Queries to check everything is running smoothly. For Example:
%presto
Show CATALOGS;

Follow Presto at Official Website, Linkedin, Youtube, and Join Slack channel to interact with the community.


Top comments (0)