
Introduction
I’ve recently started my 30-day Linux challenge as part of my preparation for the RHCSA exam. This is Day 1 and in today’s article, I’m walking you through how I set up my own RHEL 9 lab environment on Windows using VirtualBox step by step.
If you're just starting your Linux journey or planning to get certified, this guide is for you. I’ll be sharing practical articles every day, based on what I learn and apply in real-time during my RHCSA + RHCE bootcamp.
Feel free to follow along, ask questions or even take this challenge with me. This is not just about commands, it is about building real skills.
Stick around, there is a lot more coming over the next 29 days.
Index
Requirements
• Oracle VirtualBox (Download: VirtualBox.org)
• RHEL 9 ISO File (You can get it from Red Hat Official Site)
• Minimum 4GB RAM machine.
Step by Step Lab Setup
Step 1: Open VirtualBox and Create a New Virtual Machine
• Open VirtualBox.
• Click on Machine → New.
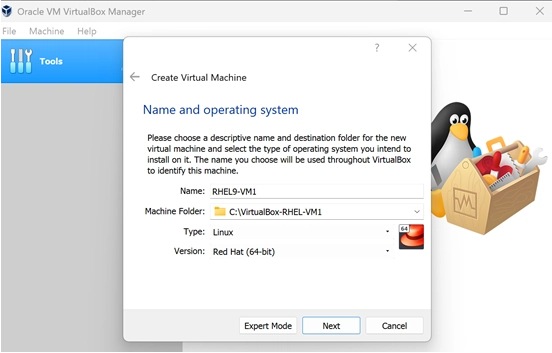
Step 2: Enter VM Details
• Name: RHEL9-VM1
• Choose a location to save the VM.
• Type: Linux
• Version: Red Hat (64-bit)
Click Next.
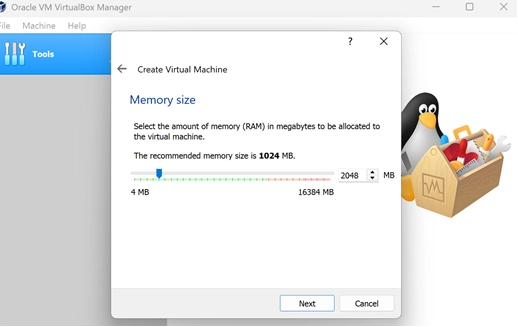
Step 3: Set Memory Size
• Allocate 2GB RAM (2048 MB).
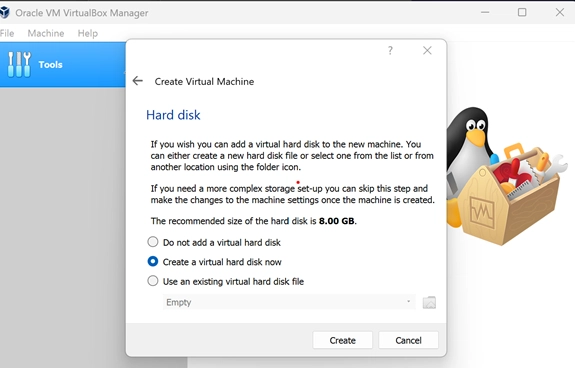
Step 4: Create Virtual Hard Disk
• Choose Create a virtual hard disk now (default).
Click Create.
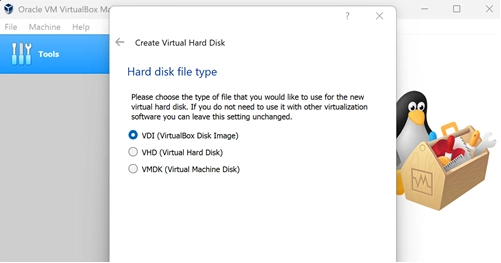
Step 5: Select Hard Disk File Type
• Choose VDI (VirtualBox Disk Image) (default).
Click Next.
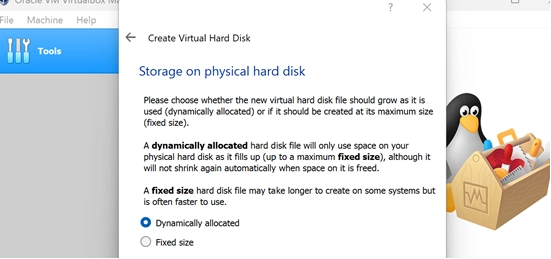
Step 6: Storage on Physical Hard Disk
• Choose Dynamically allocated (default).
Click Next.
Step 7: Set File Location and Size
• Set size to 25GB.
Click Create.
 Step 8: Adjust VM Settings for Better Performance
• Select the VM → Click Settings.
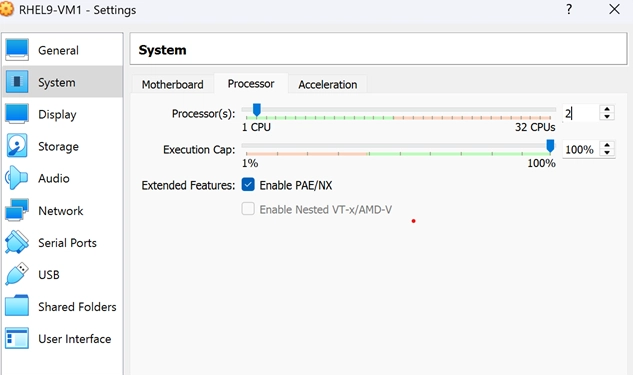
System → Processor:
• Change Processor count to 2.
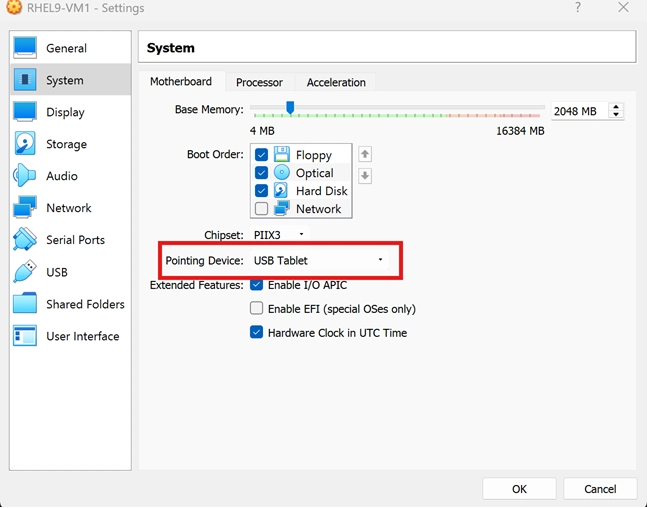
 System → Motherboard:
• Change Pointing Device to USB Tablet.
Click OK to save changes.
 Step 9: Attach the RHEL 9 ISO
• Click Start on the VM.
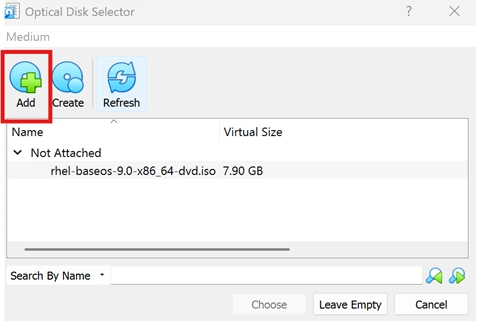
• When prompted, click the folder icon to choose a disk.
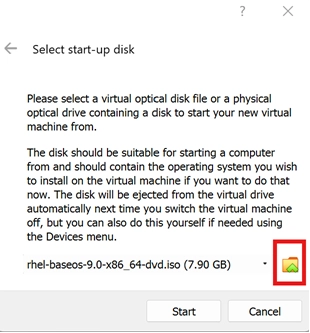 • Select your rhel-baseos-9.0-x86_64-dvd.iso file.
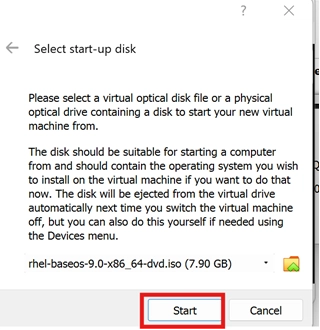
Click Start.

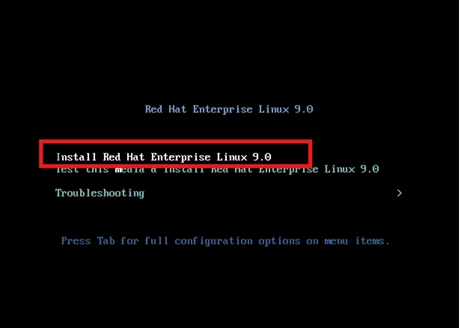
 Step 10: Begin RHEL Installation
• Use arrow keys to select Install Red Hat Enterprise Linux 9. Press Enter.
 Step 11: Choose Language
• Select English (United States) or English (United Kingdom) depending on your region.
Click Continue.
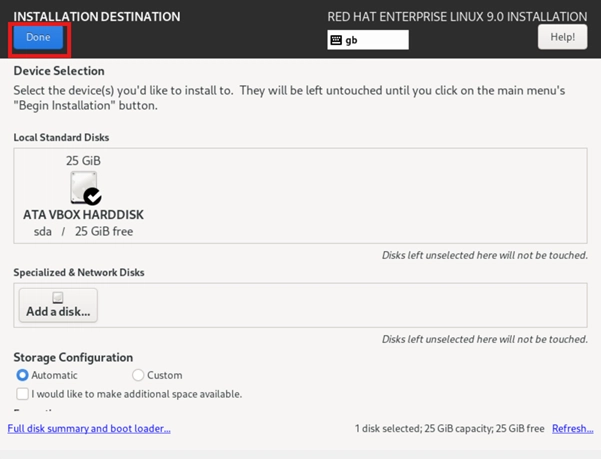
Step 12: Installation Destination
• Click on Installation Destination.
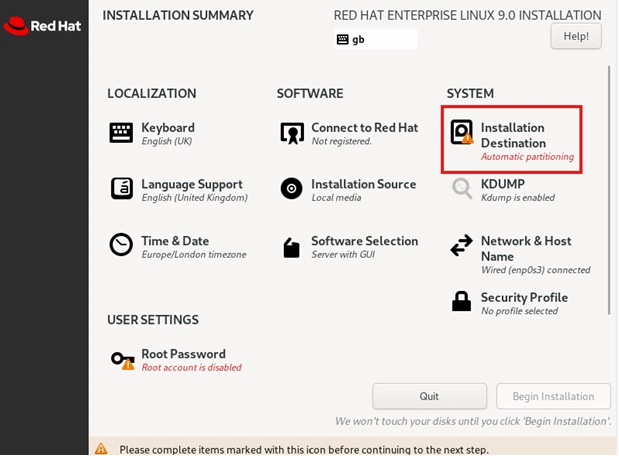 • Confirm your 25GB disk is selected.
Click Done.
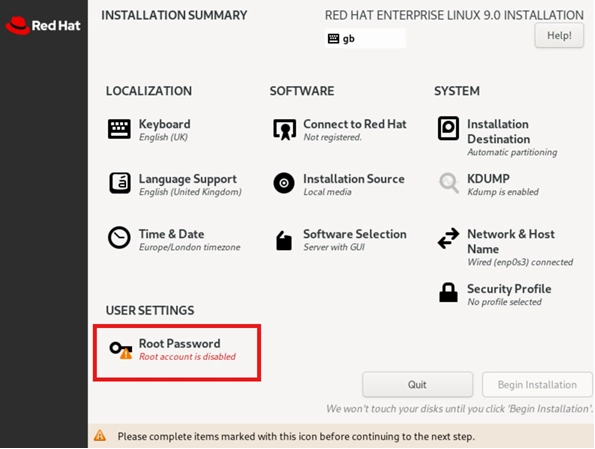
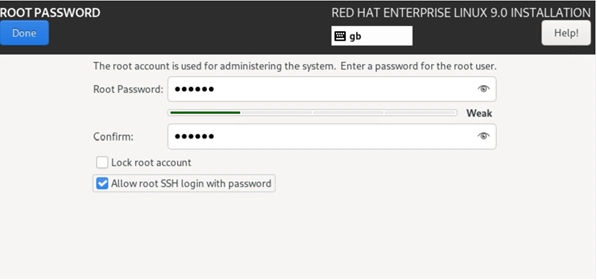
 Step 13: Set Root Password
• Click Root Password under User Settings.
 • Set password: redhat (for learning purposes).
• Enable Allow root SSH login with password.
Click Done.
 Step 14: Begin Installation
• Click Begin Installation.
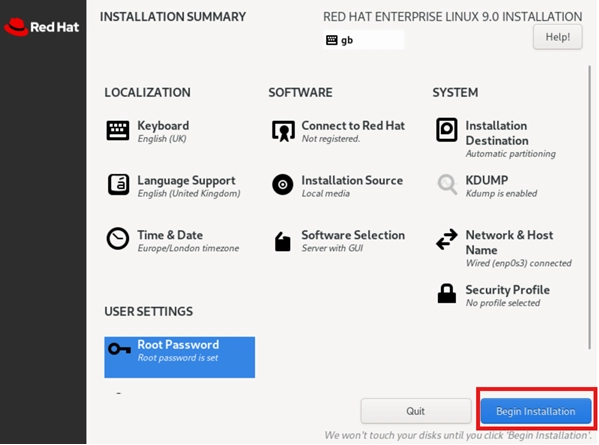 Installation will start. Relax and wait for it to complete!
🎯 Final Setup
Once installation finishes:
• Reboot the machine when prompted.
• Remove the ISO from the virtual drive if needed.
Congratulations! 🎉 Your RHEL 9 Virtual Machine is ready for action!

Best Practices and Recommendations
🌟 Pro Tips for Smooth Setup
• Always take a snapshot after fresh installation.
• Enable bidirectional clipboard and drag-and-drop from VirtualBox settings.
• Update your system after first login using:
» sudo dnf update -y
Quick Summary
🧠 Setting Up Your Linux Lab
Download and install Oracle VirtualBox, create a new virtual machine and install RHEL 9 using the ISO file.
Allocate 2GB RAM, 2 CPUs and 25GB disk space to your VM for best performance.
Follow the guided steps to complete the RHEL 9 installation and get your Linux lab ready for hands-on practice.
I'd love to hear your thoughts, insights or experiences with Linux. Feel free to share and join the conversation [Connect with me on LinkedIn www.linkedin.com/in/techwithsana ]💜


Top comments (0)