

NanoVLM-222M is a tiny but capable model that sees and understands images, then turns that understanding into words. Think of it as a lightweight brain that looks at a picture and tells you what it sees — like a mini assistant that can describe visuals in natural language.
Built using just a few hundred lines of clean PyTorch code, nanoVLM is perfect for developers, tinkerers, and researchers who want to explore image-text understanding without burning through massive compute. It’s not made for flashy demos — it’s made to be simple, fast, and educational. If you’re curious about how visual language models work under the hood, this one’s for you.
What’s Inside?
- A Vision Transformer (SigLIP-B/16-224) as the image encoder
- A SmolLM2-135M language decoder
- A thin projection layer to connect vision to language
- All of this adds up to just 222 million parameters — extremely light by modern VLM standards
GPU Configuration
Since it’s lightweight, you don’t need an expensive setup:
Minimum Requirements (for inference only):
- GPU: 8 GB VRAM (e.g., NVIDIA RTX 3060 or T4)
- vCPU: 2+
- RAM: 8 GB
- Storage: 10–15 GB free (model + image + system)
Recommended for smoother performance:
- GPU: 16 GB VRAM (e.g., RTX A4000 / A5000 / A6000)
- vCPU: 4–8
- RAM: 16+ GB
- CUDA: 11.8 or later
- Python: 3.9+
Step-by-Step Process to Install NanoVLM world`s Smallest Model Locally
For the purpose of this tutorial, we will use a GPU-powered Virtual Machine offered by NodeShift; however, you can replicate the same steps with any other cloud provider of your choice. NodeShift provides the most affordable Virtual Machines at a scale that meets GDPR, SOC2, and ISO27001 requirements.
Step 1: Sign Up and Set Up a NodeShift Cloud Account
Visit the NodeShift Platform and create an account. Once you’ve signed up, log into your account.
Follow the account setup process and provide the necessary details and information.

Step 2: Create a GPU Node (Virtual Machine)
GPU Nodes are NodeShift’s GPU Virtual Machines, on-demand resources equipped with diverse GPUs ranging from H100s to A100s. These GPU-powered VMs provide enhanced environmental control, allowing configuration adjustments for GPUs, CPUs, RAM, and Storage based on specific requirements.


Navigate to the menu on the left side. Select the GPU Nodes option, create a GPU Node in the Dashboard, click the Create GPU Node button, and create your first Virtual Machine deploy
Step 3: Select a Model, Region, and Storage
In the “GPU Nodes” tab, select a GPU Model and Storage according to your needs and the geographical region where you want to launch your model.


We will use 1 x RTX A6000 GPU for this tutorial to achieve the fastest performance. However, you can choose a more affordable GPU with less VRAM if that better suits your requirements.
Step 4: Select Authentication Method
There are two authentication methods available: Password and SSH Key. SSH keys are a more secure option. To create them, please refer to our official documentation.

Step 5: Choose an Image
Next, you will need to choose an image for your Virtual Machine. We will deploy NanoVLM on an NVIDIA Cuda Virtual Machine. This proprietary, closed-source parallel computing platform will allow you to install NanoVLM on your GPU Node.

After choosing the image, click the ‘Create’ button, and your Virtual Machine will be deployed.

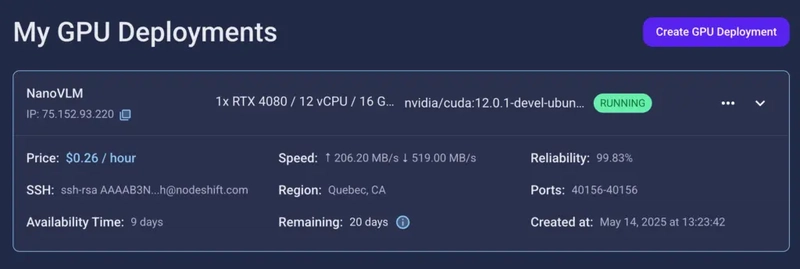
Step 6: Virtual Machine Successfully Deployed
You will get visual confirmation that your node is up and running.
Step 7: Connect to GPUs using SSH
NodeShift GPUs can be connected to and controlled through a terminal using the SSH key provided during GPU creation.
Once your GPU Node deployment is successfully created and has reached the ‘RUNNING’ status, you can navigate to the page of your GPU Deployment Instance. Then, click the ‘Connect’ button in the top right corner.


Now open your terminal and paste the proxy SSH IP or direct SSH IP.

Next, if you want to check the GPU details, run the command below:
nvidia-smi

Step 8: Check the Available Python version and Install the new version
Run the following commands to check the available Python version.
If you check the version of the python, system has Python 3.8.1 available by default. To install a higher version of Python, you’ll need to use the deadsnakes PPA.
Run the following commands to add the deadsnakes PPA:
sudo apt update

sudo apt install -y software-properties-common

sudo add-apt-repository -y ppa:deadsnakes/ppa

sudo apt update

Step 9: Install Python 3.11
Now, run the following command to install Python 3.11 or another desired version:
sudo apt install -y python3.11 python3.11-distutils python3.11-venv

Step 10: Update the Default Python3 Version
Now, run the following command to link the new Python version as the default python3:
sudo update-alternatives --install /usr/bin/python3 python3 /usr/bin/python3.8 1

sudo update-alternatives --install /usr/bin/python3 python3 /usr/bin/python3.11 2

sudo update-alternatives --config python3
Then, run the following command to verify that the new Python version is active:
python3 --version

Step 11: Install and Update Pip
Run the following command to install and update the pip:
python3 -m ensurepip --upgrade

python3 -m pip install --upgrade pip
Then, run the following command to check the version of pip:
pip --version

Step 12: Set Up Python Virtual Environment
Run the following command to set up Python virtual environment:
sudo apt install python3-venv -y

python3 -m venv nanovlm-env

source nanovlm-env/bin/activate


Step 13: Install Required Python Libraries
Run the following command to install required python libraries:
pip install torch torchvision torchaudio --index-url https://download.pytorch.org/whl/cu118

pip install transformers accelerate safetensors


Step 14: Clone the nanoVLM Repository
Run the following command to clone the nanoVLM repository:
git clone https://github.com/huggingface/nanoVLM.git

cd nanoVLM

Step 15: Run the Model and Generate Response
Execute the following command to run the model and generate response:
python3 run_nanovlm.py

Step-by-Step Process to Run NanoVLM in Browser using Gradio
Step 1: Install nano text editor
Run the following command to install nano text editor:
sudo apt update

sudo apt install nano -y

Step 2: Create and Edit app.py
Run the following command to create and edit app.py file:
nano app.py
Then paste the following Gradio code in file:
`
import gradio as gr
from models.vision_language_model import VisionLanguageModel
from PIL import Image
import torch
import torchvision.transforms as transforms
Load model
model = VisionLanguageModel.from_pretrained("lusxvr/nanoVLM-222M").cuda().eval()
Image preprocessing
transform = transforms.Compose([
transforms.Resize((224, 224)),
transforms.ToTensor(),
transforms.Normalize([0.5]*3, [0.5]*3)
])
Gradio function
def describe_image(image, prompt):
image = image.convert("RGB")
image_tensor = transform(image).unsqueeze(0).cuda()
output = model.generate(image_tensor, prompt)
return output
UI
gr.Interface(
fn=describe_image,
inputs=[
gr.Image(type="pil", label="Upload Image"),
gr.Textbox(label="Prompt", value="Describe the image")
],
outputs=gr.Text(label="Generated Output"),
title="nanoVLM-222M Image Captioning",
description="Upload an image and provide a prompt to generate captions."
).launch(share=True)
`
Once done:
- Press Ctrl+O, then Enter to save.
- Press Ctrl+X to exit nano.

Step 3: Install Gradio
Run the following command to install gradio:
pip install gradio

Step 4: Run Gradio Web App
Execute the following command to run the gradio web app:
python3 app.py
Step 5: Access the Gradio Web App
Access the Gradio Web App on:
Running on public URL: https://xxxxx.gradio.live

Then, upload the images and generate output.

Conclusion
That’s it — you’ve just brought one of the lightest and most elegant vision-language models to life, right from a GPU-powered VM. NanoVLM-222M doesn’t need massive infrastructure, complex tooling, or hours of setup. It’s minimal, transparent, and surprisingly powerful for its size.
Whether you’re a student trying to understand how image-to-text models work, a researcher building something custom, or a developer experimenting with multimodal inputs — this model gives you a perfect starting point without overwhelming you with complexity.
And the best part? It runs smoothly even on modest GPUs like an RTX 3060. No noise, no unnecessary weight — just pure function.
Now that you’ve got it working, go ahead — test your own images, tweak the architecture, build a web tool, or even try training it further. The road ahead is open, and NanoVLM is light enough to carry wherever you go.


Top comments (0)
Some comments may only be visible to logged-in visitors. Sign in to view all comments.