

Sarvam-M is a multilingual, hybrid-reasoning, text-only language model built on Mistral-Small. This advanced model offers exceptional improvements over its base counterpart, showcasing a +20% enhancement in Indian language benchmarks, a +21.6% improvement on math tasks, and a +17.6% boost in programming capabilities. Sarvam-M excels particularly in scenarios that involve Indian languages and mathematics, achieving impressive performance, including an +86% improvement on romanized Indian language GSM-8K benchmarks.
With a hybrid thinking mode, Sarvam-M supports both complex reasoning tasks such as coding and mathematical problem-solving, as well as general-purpose conversation in a seamless manner. It is specifically designed to handle both Indic scripts and romanized versions, making it a versatile solution for multilingual environments, particularly for Indian users.
The model’s superior reasoning abilities make it ideal for tasks requiring high accuracy in logical thinking, math, and coding. It can easily switch between “think” mode for complex tasks and “non-think” mode for efficient conversation.

Step-by-Step Process to Install and Run Sarvam – M Locally
For the purpose of this tutorial, we will use a GPU-powered Virtual Machine offered by NodeShift; however, you can replicate the same steps with any other cloud provider of your choice. NodeShift provides the most affordable Virtual Machines at a scale that meets GDPR, SOC2, and ISO27001 requirements.
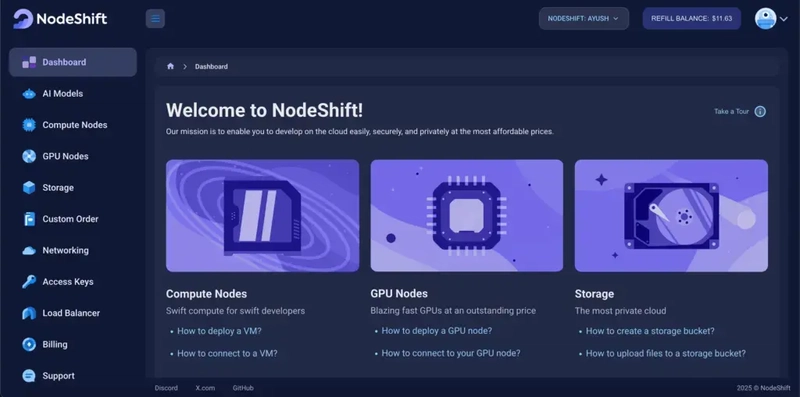
Step 1: Sign Up and Set Up a NodeShift Cloud Account
Visit the NodeShift Platform and create an account. Once you’ve signed up, log into your account.
Follow the account setup process and provide the necessary details and information.

Step 2: Create a GPU Node (Virtual Machine)
GPU Nodes are NodeShift’s GPU Virtual Machines, on-demand resources equipped with diverse GPUs ranging from H100s to A100s. These GPU-powered VMs provide enhanced environmental control, allowing configuration adjustments for GPUs, CPUs, RAM, and Storage based on specific requirements.

Navigate to the menu on the left side. Select the GPU Nodes option, create a GPU Node in the Dashboard, click the Create GPU Node button, and create your first Virtual Machine deploy
Step 3: Select a Model, Region, and Storage
In the “GPU Nodes” tab, select a GPU Model and Storage according to your needs and the geographical region where you want to launch your model.


We will use 1 x RTX A6000 GPU for this tutorial to achieve the fastest performance. However, you can choose a more affordable GPU with less VRAM if that better suits your requirements.
Step 4: Select Authentication Method
There are two authentication methods available: Password and SSH Key. SSH keys are a more secure option. To create them, please refer to our official documentation.

Step 5: Choose an Image
Next, you will need to choose an image for your Virtual Machine. We will deploy Sarvam – M on an NVIDIA Cuda Virtual Machine. This proprietary, closed-source parallel computing platform will allow you to install Sarvam – M on your GPU Node.

After choosing the image, click the ‘Create’ button, and your Virtual Machine will be deployed.

Step 6: Virtual Machine Successfully Deployed
You will get visual confirmation that your node is up and running.

Step 7: Connect to GPUs using SSH
NodeShift GPUs can be connected to and controlled through a terminal using the SSH key provided during GPU creation.
Once your GPU Node deployment is successfully created and has reached the ‘RUNNING’ status, you can navigate to the page of your GPU Deployment Instance. Then, click the ‘Connect’ button in the top right corner.


Now open your terminal and paste the proxy SSH IP or direct SSH IP.

Next, if you want to check the GPU details, run the command below:
nvidia-smi

Step 8: Check the Available Python version and Install the new version
Run the following commands to check the available Python version.
If you check the version of the python, system has Python 3.8.1 available by default. To install a higher version of Python, you’ll need to use the deadsnakes PPA.
Run the following commands to add the deadsnakes PPA:
sudo apt update
sudo apt install -y software-properties-common
sudo add-apt-repository -y ppa:deadsnakes/ppa
sudo apt update

Step 9: Install Python 3.11
Now, run the following command to install Python 3.11 or another desired version:
sudo apt install -y python3.11 python3.11-venv python3.11-dev

Step 10: Update the Default Python3 Version and Activate the Environment
Now, run the following command to link the new Python version as the default python3:
sudo update-alternatives --install /usr/bin/python3 python3 /usr/bin/python3.8 1
sudo update-alternatives --install /usr/bin/python3 python3 /usr/bin/python3.11 2
sudo update-alternatives --config python3
Then, run the following command to verify that the new Python version is active:
python3 --version
Next, run the following command to activate the python environment:
python3.10 -m venv sarvam-env
source sarvam-env/bin/activate

Step 11: Install and Update Pip
Run the following command to install and update the pip:
curl -O https://bootstrap.pypa.io/get-pip.py

python3.11 get-pip.py
Then, run the following command to check the version of pip:
pip --version

Step 12: Install Required Libraries
Run the following command to install required libraries:
pip install torch transformers accelerate

Step 13: Run directly inside the terminal (REPL) and Load the Model
In your SSH terminal, just run Python interactively:
python
Then, paste the following code in terminal to load the model:
from transformers import AutoModelForCausalLM, AutoTokenizer

model_name = "sarvamai/sarvam-m"

# Load tokenizer and model
tokenizer = AutoTokenizer.from_pretrained(model_name)
model = AutoModelForCausalLM.from_pretrained(
    model_name, torch_dtype="auto", device_map="auto"
)

Step 14: Run the Prompt
Run the prompt on terminal and generate output:
prompt = "भारत के पहले उपग्रह का नाम क्या है?"

# Format chat
messages = [{"role": "user", "content": prompt}]
text = tokenizer.apply_chat_template(
    messages, tokenize=False, enable_thinking=True
)

# Tokenize and move to GPU
model_inputs = tokenizer([text], return_tensors="pt").to(model.device)

# Generate output
generated_ids = model.generate(**model_inputs, max_new_tokens=1024)
output_ids = generated_ids[0][len(model_inputs.input_ids[0]):].tolist()
output_text = tokenizer.decode(output_ids)

# Separate reasoning if present
if "</think>" in output_text:
    reasoning_content = output_text.split("</think>")[0].strip()
    content = output_text.split("</think>")[-1].strip("</s>").strip()
else:
    reasoning_content = ""
    content = output_text.strip("</s>")

print("🧠 Reasoning:", reasoning_content)
print("🗣️ Content:", content)


Step-by-Step Process to Install and Run Sarvam – M in Browser using Gradio
Step 1: Install Dependencies
Run the following command to install dependencies:
apt update && apt install nano -y
pip install gradio


Step 2: Create the Python3 File
Run the following command to create the Python3 file:
nano sarvam_transformers_gradio.py
After this, paste the following code in the nano editor:
from transformers import AutoTokenizer, AutoModelForCausalLM
import torch
import gradio as gr

# Load model and tokenizer
model_name = "sarvamai/sarvam-m"
tokenizer = AutoTokenizer.from_pretrained(model_name)
model = AutoModelForCausalLM.from_pretrained(
    model_name,
    torch_dtype="auto",
    device_map="auto"
)

# Inference function
def chat_with_sarvam(user_input):
    messages = [{"role": "user", "content": user_input}]
    prompt_text = tokenizer.apply_chat_template(
        messages, tokenize=False, enable_thinking=True
    )
    inputs = tokenizer(prompt_text, return_tensors="pt").to(model.device)
    generated = model.generate(**inputs, max_new_tokens=1024)
    output_ids = generated[0][inputs["input_ids"].shape[1]:]
    output = tokenizer.decode(output_ids, skip_special_tokens=True)

    if "</think>" in output:
        reasoning = output.split("</think>")[0].strip()
        answer = output.split("</think>")[-1].strip("</s>").strip()
    else:
        reasoning = ""
        answer = output.strip("</s>").strip()

    return f"🧠 Reasoning:\n{reasoning}\n\n🗣️ Answer:\n{answer}"

# Gradio UI
gr.Interface(
    fn=chat_with_sarvam,
    inputs=gr.Textbox(lines=2, placeholder="Ask something..."),
    outputs="text",
    title="Sarvam-M Chat (Transformers)",
    description="Hybrid reasoning — math, code, culture — via Transformers."
).launch(server_name="0.0.0.0", server_port=7860)
After Pasting:
- Press Ctrl + O → Enter to save
- Then Ctrl + X to exit

Step 3: Run Gradio Web App
Execute the following command to run the gradio web app:
python3 sarvam_transformers_gradio.py

Step 4: Run SSH Port Forwarding Command to access the Gradio Web App
Run the following command to access the Gradio web app (or any other port from your VM) on your local machine:
ssh -L 7860:localhost:7860 root@116.127.115.18 -p 26052

Step 5: Access the Gradio Web App
Access the Gradio Web App on:
Running on local URL: http://localhost:7860


Conclusion
In this guide, we have successfully walked through the process of setting up and deploying the Sarvam-M model locally on a GPU-powered Virtual Machine. Sarvam-M stands out for its ability to seamlessly handle both multilingual tasks and advanced reasoning capabilities, making it ideal for a wide range of applications from complex mathematical problem-solving to general conversation. By following the steps outlined in this blog, you can easily integrate this powerful model into your own environment and start utilizing its hybrid reasoning modes for a range of tasks. Whether you’re running it for development, research, or practical applications, Sarvam-M’s capabilities will help enhance your productivity and problem-solving efficiency.


Top comments (0)
Some comments may only be visible to logged-in visitors. Sign in to view all comments.