
This article is written by Marko Aleksendric (Data Analyst)
In the world of Python web development, Django is considered a powerhouse. It is one of the oldest, yet most actively developed web frameworks with a vibrant developer community. Technically speaking, Django is a third-party Python framework for creating web applications that run on a server.
Django has its way of doing things—through a paradigm called MVT (Model – View – Template)—and once you get used to it, it becomes very intuitive and fast. A Django web application is typically contained in a project that is further structured into what are called Django Apps—essentially, Python modules responsible for different types of common functionality. For simple projects, we can even have only one app.
Each app is responsible for its own group of URLs that are mapped to views—a conveniently named views.py file, which contains what is in other frameworks known as the controllers—a set of functions and, recently, classes. Based on the requested URL, these provide the application logic and interact with a database. These databases have traditionally been relational, but that is about to change!
Django owes its popularity and longevity to numerous factors: As long as we adhere to the Django way of doing things, it allows us to quickly build robust and secure web applications of varying degrees of complexity. Out of the box, Django provides some features that developers have loved for decades: an admin site that we get practically for free (with three simple lines of code and without any additional work), a simple yet powerful HTML templating language, and a complex yet simple to use ORM (object relational mapper) for building powerful queries.
During the past decade, with the rise in popularity of single-page applications and various frontend frameworks and libraries (such as React, Next.js, Vue.js, and Svelte), Django is being used as a backend solution by making it output JSON data instead of HTML pages, through the Django REST Framework, Django-Ninja, or by simply setting the views to output valid JSON.
It is worth mentioning that Django isn’t a web server. In fact, it requires one to serve its content. However, the “batteries included” principle implies that there is a development server that is more than enough for development. The “batteries included” moniker means also that Django itself provides everything that is needed to build a performant web application of high complexity—from the database models, to the business logic, the templating engine, the routing system, and hundreds of plugins for every imaginable purpose.
Finally, the vast Django ecosystem provides thousands of third-party integrations for virtually every problem enough developers have encountered during the past two decades.
Django has a great website with a legendary tutorial that is often updated and always matches the latest version.
OPTIONAL: When it comes to books, the author of this article has found William S. Vincent's books to be the fastest when you need to dive into Django. Michael Dinder’s book, Becoming an Enterprise Django Developer, is a great place to learn many Django-specific best practices.
A needed integration
The idea of integrating MongoDB, the most popular and powerful document-based database and the most popular Python web framework, is not new. There have been attempts in the past years, and even some pretty long-lived projects that had, however, limited usability.
The Django MongoDB Backend that we are going to use in a simple project is the result of the MongoDB team listening to the needs of the Django community. As listed in the announcement, the DMB project provides a much deeper and thorough integration approach, with the aim to provide the use of Django models (the backbone of Django projects), and to have a fully functional and customizable Django admin. It also offers native connection handling by the settings.py file, a special file in the heart of every Django project that is orchestrating the database, the applications, plugins, URL mappings, and so on. The provided project and application templates ensure that everything is configured correctly, but nevertheless, it is important to know exactly what is going on under the hood.
The Django MongoDB Backend is an official integration from MongoDB released in February 2025 as a public preview, providing models, migrations, and the admin panel and making it easy for Django developers to adopt MongoDB.
On the other hand, the DMB project allows developers to use the unleashed power of MongoDB aggregations, vector search, embedded documents, and virtually anything achievable through the official PyMongo driver. The project is not yet recommended for production use, but the roadmap includes support for MongoDB’s document model, encryption features, and native support for Atlas Search and Vector Search. Integrating MongoDB’s Vector Search with Django allows for quick and efficient development of AI-powered applications as we will see.
The project: a smart recipe application
To showcase the Django MongoDB Backend, we will create a simple project—a web application that will store recipes (the ingredients and the instructions)—and provide a couple of ways to search through them and get recommendations based on the current contents of your fridge. We will use some scraped recipes and try to showcase the speed and power of the backend through a simple application.
This is also a great opportunity to mention that MongoDb recently announced the acquisition of Voyage AI—a leader in embedding and re-ranking models.
AI-powered search and retrieval—particularly embedding generation and reranking—can extract relevant contextual data to ground AI outputs and ensure accuracy, as seen in popular paradigms such as retrieval augmented generation (RAG). And in this project, we will build a sort-of-kind-of RAG-like system.
MongoDB believes these capabilities belong in the database layer to simplify application stacks and create a more reliable foundation for AI systems. Their acquisition of Voyage AI, a leader in embedding and reranking models, aims to integrate these capabilities directly into database systems, helping businesses mitigate hallucinations, improve trustworthiness, and establish a flexible, intelligent data foundation that redefines databases for the AI era.
Voyage AI has developed state-of-the-art embedding models that significantly outperform competitors in precision and recall benchmarks related to information retrieval.
This project will help you get a taste of each of these technologies: Django for the creation of the web app, Django MongoDB Backend for the integration of MongoDB, PyMongo for direct interaction with MongoDB, Voyage AI for the embeddings necessary for the vector representation of recipe ingredients, and Anthropic’s powerful Claude LLM for the creation of the suggestions.
Prerequisites
This project will require a couple of resources:
- An IDE (integrated development environment)—in this case, we will use Visual Studio Code
- Python 3.10 or later—we will be using version 3.12.6
- The Atlas CLI (command line interface)
- Docker
- A local Atlas deployment
- A Voyage API key (link) for generating the embeddings
- An Anthropic API key for the LLM
Create your local Atlas deployment
In this project, we will leverage the Atlas CLI to create a local Atlas deployment
Once you have the prerequisites installed, you can create a deployment, type in the terminal
atlas deployments setup, and select Local Database deployment.
The terminal will output something similar to the following:
How do you want to set up your local Atlas deployment? _default_
Creating your cluster local1524
1/3: Starting your local environment...
2/3: Downloading the latest MongoDB image to your local environment...
3/3: Creating your deployment local1524...
Deployment created!
Connection string: "mongodb://localhost:12404/?directConnection=true"
Copy this connection string, as we will use it throughout our project.
Note: Keep in mind that the connection string can point to an online Atlas instance with no modifications and Docker isn't necessary for this tutorial, but was a personal choice.
Create a Python virtual environment
Every Python project begins with a new environment as it allows you to keep the packages under control and avoid collisions with other projects.
To create the environment venv, in your terminal, run:
python -m venv venv
Then, proceed to activate it:
source venv/bin/activate
Installing the dependencies
Now, we can create a project folder (usually the one that contains the /venv virtual environment) and install the dependencies from a requirements.txt file. Create a requirements.txt file and populate it with the necessary packages if you want to be able to reproduce this environment exactly:
anthropic==0.47.2
django-mongodb-backend==5.1.0b0
python-dotenv==1.0.1
voyageai==0.3.2
Anthropic provides us with the LLM model (the Claude family), python-dotenv is used for securely managing secret environment variables such as connection strings and API keys, and Voyage will provide the powerful embeddings from… Voyage AI.
Install the requirements:
pip install -r requirements.txt
And you should be ready to roll!
Creating a Django MongoDB Backend project
It is finally time to create our project leveraging the nifty project template provided by the DMB team. We will effectively use the django-create-project command and its app nomenclature, but with a couple of twists. The template ensures that we get the MongoDB-specific migrations, and the ObjectId as the primary key in the models.
Let’s name the project cookbook and use the django-admin command (the standard way of beginning Django projects) using the provided template. The use of the template is mandatory as it contains the necessary modifications that enable the backend to bridge Django and MongoDB:
django-admin startproject cookbook --template https://github.com/mongodb-labs/django-mongodb-project/archive/refs/heads/5.0.x.zip
We will not go over the project structure, as this is examined in detail in the quickstart guide.
What is of paramount importance at this point is the fact that, while the default Django project provides an SQLite database for prototyping, with the DMB project, we must provide the MongoDB connection string in the cookbook/settings.py file (around line 79):
DATABASES = {
    "default": django_mongodb_backend.parse_uri(
        "mongodb://localhost:12404/cookbook?directConnection=true"
    ),
}
Do not forget to add the database name cookbook after the host. Otherwise, Django Mongo Backend will not be able to know which database to create and where to put the collections! The documentation shows that there are more ways of specifying the database and collection.
This is the right time to spin up the development server and check that everything works. Enter into the project subdirectory (cookbook):
cd cookbook
And run the command:
python manage.py runserver
You should be greeted with a message saying that the server is running and that there are unapplied migrations. That is good!

Creating our first (and only) Django application
To create our application, we will again use another convenient template provided by the Django-MongoDB team, making sure to name the app recipes. This template sets the newly created Django app compatible with the Backend.
python manage.py startapp recipes --template https://github.com/mongodb-labs/django-mongodb-app/archive/refs/heads/5.0.x.zip
It is worth remembering that this application template sets the default auto field to a MongoDB ObjectID, instead of Django’s original BigAutoField for model IDs—something that you can verify by inspecting the recipes/app.py file.
After the app is created with the usual Django structure, we can proceed and populate the models.py file that will define the structure of our data.
Before doing that, let us examine a JSON representation of the document that we want to be able to store and query. The recipe structure that we are going to use in this application is the following:
{
        "title": "Irish Soda Bread",
        "ingredients": [
            "1/2 cup white sugar",
            "4 cups all-purpose flour",
            "2 teaspoons baking powder",
            "1 teaspoon baking soda",
            "3/4 teaspoon salt",
            "3 cups raisins",
            "1 tablespoon caraway seeds",
            "2 eggs, lightly beaten",
            "1 1/4 cups buttermilk",
            "1 cup sour cream"
        ],
        "instructions": "Preheat oven to 350 degrees F (175 degrees C). Grease a 9 inch round cast iron skillet or a 9 inch round baking or cake pan.\nIn a mixing bowl, combine flour (reserving 1 tablespoon), sugar, baking powder, baking soda, salt, raisins and caraway seeds. In a small bowl, blend eggs, buttermilk and sour cream. Stir the liquid mixture into flour mixture just until flour is moistened. Knead dough in bowl about 10 to 12 strokes. Dough will be sticky. Place the dough in the prepared skillet or pan and pat down. Cut a 4x3/4 inch deep slit in the top of the bread. Dust with reserved flour\nBake in a preheated 350 degrees F (175 degrees C) oven for 65 to 75 minutes. Let cool and turn bread onto a wire rack.\n",
        "embedding_ingredients": "white sugar, all-purpose flour, baking powder, baking soda, alt, raisins, caraway seeds, eggs, lightly beaten, buttermilk, our cream",
        "features": {
            "cuisine": "Irish",
            "preparation_time": "medium",
            "complexity": "low",
            "prep_time": 25
        }
    }
This is adapted from an online recipe repository in JSON format. The provided JSON is just a small subset of the data available on the original site, and the keys embedding_ingredients and features are added for educational purposes. You will find it in the application repo as bigger_sample.json. In a real-world system, the recipes would get parsed and the features would either be provided or they would get added at insertion time. The same goes for the embeddings. Once a user inserts a recipe in the application, the embeddings would be generated automatically and the recipe would be saved. In this example, however, we are working with a pre-built dataset in JSON format, so we are importing it into MongoDB (along with some additional data generated by an LLM) and adding the Voyage AI embeddings later.
The extraction of the ingredients doesn’t have much to do with the Django MongoDB Backend itself, and the features dictionary is added somewhat arbitrarily for convenience, but also so we can showcase some MongoDB querying on embedded fields.
Creating the models of the application
Let’s try to model this data structure with Django. Open the models.py file in the recipes folder and add the following:
from django.db import models
from django_mongodb_backend.fields import ArrayField, EmbeddedModelField
from django_mongodb_backend.models import EmbeddedModel
from django_mongodb_backend.managers import MongoManager

class Features(EmbeddedModel):
    preparation_time = models.CharField(max_length=100)
    complexity = models.CharField(max_length=100)
    prep_time = models.IntegerField()
    cuisine = models.CharField(max_length=100, null=True, blank=True)

class Recipe(models.Model):
    title = models.CharField(max_length=200)
    instructions = models.TextField(blank=True)
    features = EmbeddedModelField(Features, null=True, blank=True)
    ingredients = ArrayField(models.CharField(max_length=100), null=True, blank=True)
    embedding_ingredients = models.CharField(max_length=500, null=True, blank=True)
    voyage_embedding = models.JSONField(null=True, blank=True)

    objects = MongoManager()

    class Meta:
        db_table = "recipes"
        managed = False

    def __str__(self):
        return f"Recipe {self.title}"
There are several moving parts in the models.py file that need a bit of explanation. As documented on the Django MongoDB Backend website, the Backend supports both Django and MongoDB fields.
In our recipe model, we are using the ArrayField for representing the array of floats that will be generated later from the Voyage AI embedding model. The Features is an EmbeddedModel that will not get its own collection (since it is, well, embedded), leveraging MongoDB best practices.
Also, just the Recipe model gets its own Manager and a db_table in the Meta of the class. We will indeed have just one collection, Recipes, in which each document will have an embedded Features document.
After saving the models.py file, it is important to make Django aware of our new application. Open the settings.py file and edit the INSTALLED_APPS part:
INSTALLED_APPS = [
    "recipes.apps.RecipesConfig",
    "cookbook.apps.MongoAdminConfig",
    "cookbook.apps.MongoAuthConfig",
    "cookbook.apps.MongoContentTypesConfig",
    "django.contrib.sessions",
    "django.contrib.messages",
    "django.contrib.staticfiles",
]
Finally, let’s hook up the admin site. Even though many developers won’t admit it, it is one of the strongest selling points of the framework. Open the admin.py file inside the cookbook/recipes folder and edit it:
from django.contrib import admin
from .models import Recipe

admin.site.register(Recipe)
In order to be able to inspect the admin site, we need to do two more things: apply the migrations and create a superuser with unlimited power.
Stop the development server if you left it running and use the powerful manage.py file again:
python manage.py makemigrations
python manage.py migrate
You should now be able to see the database and the collections created in your Atlas instance if you are peeking into it with MongoDB Compass or the MongoDB VSC Extension for instance.

Creating basic views and templates
In Django development, the workflow typically follows a cyclical pattern centered around the Model-View-Template (MVT) paradigm. We begin by defining models in the application models.py, which represent collections and their relationships, followed by migrations to create or update the schemas.
Next, we develop views in views.py to handle user requests and implement business logic. These views determine which data to retrieve from models and which templates to render. Templates are then created, containing HTML with the Django template language (very similar to Jinja if you have worked with Flask or FastAPI) to display dynamic data passed from views.
Once these components are implemented, URLs are configured in urls.py to route requests to appropriate views. This cycle continues throughout development, with developers leveraging Django's admin interface for quick data manipulation and management. The workflow embraces Django's DRY/"don't repeat yourself" philosophy, allowing for rapid development and clean separation of concerns.
We will not delve much into Django’s templating language. It is very straightforward and intuitive. But we will make a base template from which the other templates will inherit (extend it, in Django terms) and we will use CDN—delivered Tailwind CSS for simplicity and to make the application not the ugliest thing on the web.
Create a folder called templates in the /recipes folder and inside it, create a file base.html:
<!doctype html>
<html lang="en">
<head>
<meta charset="UTF-8" />
<meta name="viewport" content="width=device-width, initial-scale=1.0" />
<title>{% block title %}Django MongoDB Backend Recipes{% endblock %}</title>
<script src="https://unpkg.com/@tailwindcss/browser@4"></script>
{% block extra_css %}{% endblock %}
</head>
<body class="flex flex-col min-h-screen bg-gray-50">
<!-- Main Content -->
<main class="container mx-auto px-4 py-6 flex-grow">
{% block content %}
<h1 class="text-3xl font-bold underline">Hello world!</h1>
{% endblock %}
</main>
<!-- Footer -->
<footer class="bg-gray-800 text-white py-6">
<div class="container mx-auto px-4">
<div class="flex flex-col md:flex-row justify-between items-center">
<div class="mb-4 md:mb-0">
<p>© {% now "Y" %} Django + MongoDB <3 </p>
</div>
</div>
</div>
</footer>
</body>
</html>
The base.html template will be displayed on every page and in that regard, it is similar to the layouts in Next.js or SveltKit, if you are coming from the JS world. The pages that we will create are the following:
- A generic home page
- A page that lists the top recipes alphabetically—a typical list view
- A detail page for each recipe
- A search page for querying the recipes collection with Atlas fuzzy search
- A search page for performing vector search and displaying the results
- An AI-powered suggestion page that provides recipes based on the available ingredients
Now, let’s create a simple, bare-bones index.html page that will contain nothing more than a header, in the same level where the base template resides:
{% extends 'base.html' %}

{% block content %}
    <h1 class="text-3xl font-bold text-center">{{ message }}</h1>
{% endblock %}
The template(s) are ready, but now we need a view that will actually point the URL to it. Open the /cookbook/views.py and add the following:
from django.shortcuts import render

def index(request):
    return render(request, "index.html", {"message": "Recipes App"})
The render function is one of the most frequent ways for rendering templates. It accepts an HTTP request, the name of the template, and the context containing data to be displayed, in the form of a dictionary. In this case, we just want to render a message containing the text “Recipes App,” but later, it will be arrays of recipes, dictionaries, and other rich structures.
We are all eager to try this out, but before that, we need to create a urls.py file in the cookbook/views.pyfile:
from django.urls import path
from . import views

urlpatterns = [
    path("", views.index, name="index"),
]
And this file just manages our sole view, mapping it to the “/” url (the root of the website).
Lastly, let’s make Django aware of our urls.py by hooking it up in the project-wide urls.py file: (cookbook/urls.py):
from django.contrib import admin
from django.urls import include, path

urlpatterns = [
    path("admin/", admin.site.urls),
    path("", include("recipes.urls")),
]
Congratulations! You have just completed the Django cycle—a view, a template, a urls.py edit!
Now, we can spin up the dev server with:
python manage.py runserver
And you should see our minimal home page.
Importing recipe data
Although we are able to insert recipes through the admin panel, that would be no fun at this point. Instead, we will insert an array of recipes in bulk, through an external script. If you remember, we included the python-dotenv package in our requirements.txt file. We will use it to manage the API keys for the Voyage AI and Claude services, but we can also use it to keep track of our MongoDB URI and the database and collections(s) names.
In the following section, you will import the initial recipes data (without the embeddings, as we want to separate this part to emphasize it!) into MongoDB.
Create an .env file at the root of the project (same level as the /venv directory) and insert the following:
MONGO_URI=mongodb://localhost:12404/?directConnection=true
MONGO_DB=cookbook
MONGO_COLLECTION=recipes
Now, we will use the provided recipes_sample.json file and build a simple script for importing our data. Create at the project level a script named import_json_recipes.py and insert the following:
import os
import pymongo
import json
from dotenv import load_dotenv

# Load environment variables from .env file
load_dotenv()

# Get MongoDB connection URI and database name from environment variables
# Falls back to default values if not set
MONGO_URI = os.getenv("MONGO_URI", "mongodb://localhost:12404/?directConnection=true")
MONGO_DB = os.getenv("MONGO_DB", "cookbook")

try:
    # Establish connection to MongoDB
    client = pymongo.MongoClient(MONGO_URI)
    db = client[MONGO_DB]
    print(db)

    # Open and load the JSON file containing recipe data
    with open("bigger_sample.json", "r") as f:
        recipes_data = json.load(f)

    # Iterate through each recipe in the loaded data
    for recipe in recipes_data:
        try:
            # Create a document with selected fields from the recipe
            recipe_doc = {
                "title": recipe["title"],
                "ingredients": recipe["ingredients"],
                "instructions": recipe["instructions"],
                "embedding_ingredients": recipe["embedding_ingredients"],
                "features": recipe["features"],
            }
            print(recipe_doc)

            # Insert the recipe document into the 'recipes' collection
            db.recipes.insert_one(recipe_doc)
        except Exception as e:
            # Handle errors for individual recipe insertion
            print(f"Error inserting recipe: {e}")

    # Print success message with count of inserted recipes
    print(f"Inserted {len(recipes_data)} recipes into MongoDB")

except pymongo.errors.ConnectionFailure as e:
    # Handle MongoDB connection failures
    print(f"Error connecting to MongoDB: {e}")
except Exception as e:
    # Handle any other exceptions during the import process
    print(f"Error inserting recipes: {e}")
Place the recipes_sample.json in the same directory and start the script:
python import_json_recipes.py
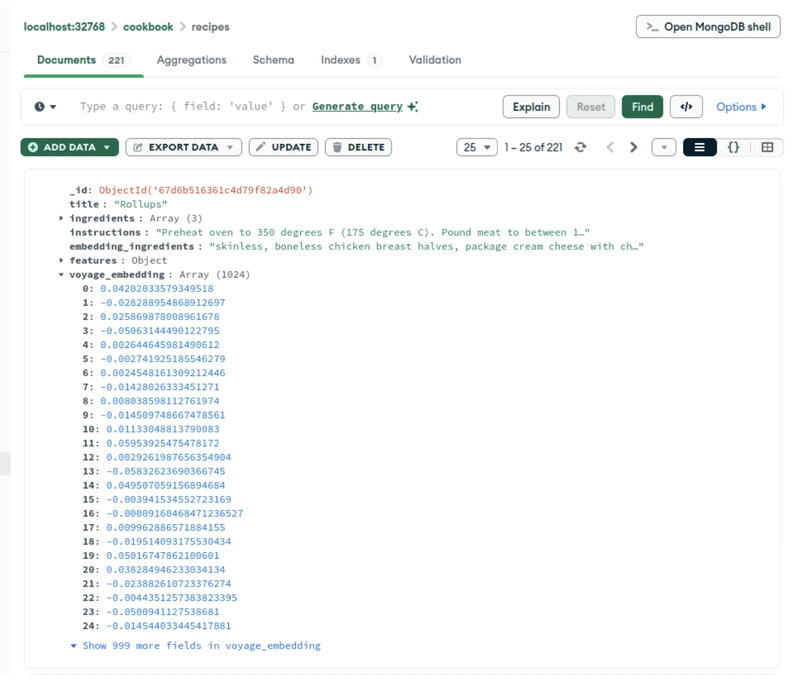
After a few seconds, your collection should be populated with roughly 200 recipes—not too much, but enough for tinkering and getting a feel of the data structure and searching and aggregation capabilities. But before starting to play with the data, let’s add the final part of the puzzle: the Voyage AI embeddings!

Generating Voyage AI embeddings
Vector databases are specialized systems built to handle vectorized data—those scary-looking, high-dimensional arrays of numbers that AI models generate in order to be able to talk to each other in the only language they truly understand: numbers and vectors.
You can think of these as special databases that are really good at working with vector embeddings (the numerical representations that capture the semantic and real meaning of text, images, etc.). What's great about MongoDB is that it lets us store these embeddings right alongside our actual data, which makes retrieving documents much easier, whether we're grabbing them directly or through simple relationships when documents are chunked up. In RAG (retrieval-augmented generation) systems, chunking involves splitting documents into smaller, more manageable segments of text before creating embeddings for them, which enables more precise retrieval of relevant context. These chunks strike a balance between being small enough to provide focused information yet large enough to preserve contextual meaning, thus improving the relevance of retrieved content when responding to user queries.
But here's the thing. Embedding models are very important in this whole setup! They are what transform our messy, complex data into those neat vector embeddings that databases can work with. These models are key to capturing how different pieces of data relate to each other semantically, which powers advanced search and analysis. When you use the same embedding model for both storing your data and processing queries, your vector database can effectively find similar content based on meaning, not just exact matches. This is what makes things like personalized recommendations and semantic search possible. Bringing these embedding models together with vector databases just makes building and scaling AI applications much more straightforward, and MongoDB allows us to do that.
Before starting to write views and templates to display our recipes, we will create another script for generating embeddings with the Voyage AI API. Visit the Voyage AI website and create an API key if you haven’t already, and store it into the .env file that you created.
Take some time to familiarize yourself with the Voyage AI Python API docs and you will find it is simple and user-friendly.
Since we will be using the free version (no credit card!), the script will contain a call to the Python’s time.sleep() function to introduce some delay, so that we stay within the API rate limits. Create a script named generate_embeddings.py in the root of the project (same level as the venv folder):
import os
import time

import pymongo
import voyageai
from dotenv import load_dotenv
from tqdm import tqdm

load_dotenv()

MONGO_URI = os.getenv("MONGO_URI", "mongodb://localhost:12404/?directConnection=true")
MONGO_DB = os.getenv("MONGO_DB", "cookbook")


# MongoDB connection
try:
    # Connect to MongoDB
    client = pymongo.MongoClient(MONGO_URI)
    db = client[MONGO_DB]
    collection = db["recipes"]

    # Initialize Voyage AI client
    # This automatically uses the VOYAGE_API_KEY environment variable
    vo = voyageai.Client()

    # Find documents without voyage_embedding
    query = {"voyage_embedding": {"$exists": False}}
    documents_without_embeddings = list(collection.find(query))

    print(
        f"Found {len(documents_without_embeddings)} documents without Voyage embeddings"
    )

    # Add embeddings to documents that don't have them
    for doc in tqdm(documents_without_embeddings, desc="Adding embeddings"):
        # Prepare content for embedding - just the title and the ingredients
        content_to_embed = (
            f"{doc['title']}. Ingredients: {doc['embedding_ingredients']}"
        )

        # Get embedding from Voyage AI
        try:
            embedding_result = vo.embed(
                [content_to_embed],
                model="voyage-lite-01-instruct",
                input_type="document",
            )
            embedding = embedding_result.embeddings[0]

            # Update document with embedding
            collection.update_one(
                {"_id": doc["_id"]}, {"$set": {"voyage_embedding": embedding}}
            )

            # Add a small delay to avoid hitting rate limits
            time.sleep(25)

        except Exception as e:
            print(f"Error generating embedding for recipe '{doc['title']}': {e}")

    print(
        f"Successfully added embeddings to {len(documents_without_embeddings)} documents"
    )

except pymongo.errors.ConnectionFailure as e:
    print(f"Error connecting to MongoDB: {e}")
except Exception as e:
    print(f"Error processing documents: {e}")
Finally, run the script in the terminal:
python generate_embeddings.py
Give this script a couple of minutes, or even better, sign up for a Voyage AI API key with a credit card (still free as in free beer) and ditch the sleep function call altogether. After the script has finished, we will have roughly 200 recipes with embeddings, ready to be queried, aggregated and, who knows, maybe even cooked? Let’s start building some simple views.
A couple of traditional Django views
The real fun with Django web development begins with writing the views—functions that apply the business logic, interact with the database, and output Python data structures of varying complexity to be displayed in the templates.
This tutorial will cover only a couple of “traditional” Django views, just enough to get the hang of it. Let’s create a trivial view that displays the first 20 recipes alphabetically. Django makes this task very simple. Edit the views.py/ file and add the following view:
def recipe_list(request):
    recipes = Recipe.objects.all().order_by("title")[:20]

    return render(request, "recipe_list.html", {"recipes": recipes})

Yes, it is as simple as it seems. Let’s finish the cycle, and add a template (in the folder /recipes/templates). Name it top_recipes.html and add the following:
{% extends 'base.html' %}

{% block content %}
<h1 class="text-3xl font-bold mb-6">Alphabetical list of recipes</h1>

{% if recipes %}
<ul class="list-disc pl-5">
    {% for recipe in recipes %}
    <li class="mb-1">
        {% comment  %}
        <a href="{% url 'recipe_detail' recipe.id %}">{{ recipe.title }}</a>
        {% endcomment %}
        {{ recipe.title }}
    </li>
    {% endfor %}
</ul>
{% else %}
<p>No recipes found matching "{{ query }}".</p>
{% endif %}

{% endblock %}
The Django templating language allows looping over lists of objects, provides if/else constructs, custom filters, and much, much more, but that is beyond the scope of this tutorial. The final piece of the cycle is plugging it into the application-level urls.py which will now look like this:
from django.urls import path
from . import views

urlpatterns = [
    path("", views.index, name="index"),
    path("top/", views.top_recipes, name="top_recipes"),
]
Before starting the development server, let’s add the most essential view—for viewing an individual recipe. Remember that we are using MongoDB's ObjectId as the primary key, so we need to take that into account.
Add another view to the views.py file:
def recipe_detail(request, recipe_id):
    """
    Display a recipe by its MongoDB ObjectId

    Args:
        request: Django request object
        recipe_id: String representation of the MongoDB ObjectId
    """
    # Convert string ID to MongoDB ObjectId
    try:
        object_id = ObjectId(recipe_id)
    except InvalidId:
        raise Http404(f"Invalid recipe ID format: {recipe_id}")

    # Get the recipe or return 404
    recipe = get_object_or_404(Recipe, id=object_id)

    # Create context with all needed data
    context = {"recipe": recipe}

    return render(request, "recipe_detail.html", context)
At the top of the views.py file, add the necessary imports:
from bson import ObjectId
from bson.errors import InvalidId
from django.http import Http404
from django.shortcuts import get_object_or_404, render
The bson package provides us the ObjectId itself, as well as the InvalidId error, while Django provides all the possible http-related helpers: In this case, we are using the standard get_object_or_404 shortcut that, as the name implies, fetches an object by ID or returns a 404 error response in case the object isn't found.
The other Http404 response is needed because we must first validate that the provided ID is actually convertible to a valid ObjectId. If you were working with plain Django, this step would not be needed.
Let’s provide a simple template for displaying the individual recipe. Create the file recipe_details.html in the templates folder:
{% extends 'base.html' %}

{% block title %}{{ recipe.title }}{% endblock %}

{% block content %}
<div class="max-w-2xl mx-auto py-4">
    <h1 class="text-xl font-semibold mb-3">{{ recipe.title }}</h1>

    {% if recipe.prep_time %}
    <p class="text-sm text-gray-600 mb-3">Prep time: {{ recipe.prep_time }} minutes</p>
    {% endif %}

    <div class="mb-4">
        <h2 class="text-md font-medium mb-1">Ingredients</h2>
        <div class="pl-4">
            <ul>
                {% for ingredient in recipe.ingredients %}
                <li>{{ ingredient }}</li>
                {% endfor %}
            </ul>
        </div>
    </div>

    <div>
        <h2 class="text-md font-medium mb-1">Instructions</h2>
        <div class="pl-4">
            {{ recipe.instructions|linebreaks }}
        </div>
    </div>
</div>
{% endblock %}
The templates contain simple Tailwind classes for purely aesthetic purposes, and you are of course free to go with bare-bones HTML or use virtually any CSS framework.
The urls.py entry for this view is a bit different, as it contains a parameter—the recipe_id that will be passed to the view function:
path("recipe/<str:recipe_id>/", views.recipe_detail, name="recipe_detail")
The natural conversion of a MongoDB document structure into the Django templating language is a big plus: Development becomes fast, and errors are rare and easily identifiable.
Start the server, try out the URLss /search and /list, and verify that the links are working.
If inclined, you could create the remaining CRUD views yourself, for creating new and updating recipes.
Bear in mind that in that case, you would need to take in account the Voyage embeddings and regenerate them after every save. Django models provide a ton of features and methods, and overriding the save() method is probably the best place to implement such functionality.
Now, we will leverage some MongoDB specificities that make this crossover such a powerful tool in modern, AI-powered web development!
MongoDB aggregations and indexes
We will create a simple MongoDB aggregation to display the number of recipes belonging to each type of cuisine: French, Italian, Asian, and so on.
As per documentation:
Raw queries allow you to query the database by using MongoDB's aggregation pipeline syntax rather than Django methods. You can also run queries directly on your MongoClient object for expanded access to your MongoDB data. Let’s use the raw_aggregate and create a view that builds the aggregation pipeline.
Edit the views.py file:
def recipe_statistics(request):

    # Define the aggregation pipeline
    pipeline = [
        # Stage 1: Extract cuisine from the features subdocument
        {"$project": {"_id": 1, "cuisine": "$features.cuisine"}},
        # Stage 2: Group by cuisine and count occurrences
        {"$group": {"_id": "$cuisine", "count": {"$sum": 1}}},
        # Stage 3: Sort by count in descending order
        {"$sort": {"count": -1}},
        # Stage 4: Reshape the output for better readability
        {
            "$project": {
                "_id": 1,
                "cuisine": {"$ifNull": ["$_id", "Unspecified"]},
                "count": 1,
            }
        },
    ]

    stats = Recipe.objects.raw_aggregate(pipeline)
    result = list(stats)

    return render(
        request,
        "statistics.html",
        {"cuisine_stats": result},
    )
Just being aware of the possibility of providing a MongoDB aggregation to the raw_aggregate method simplifies development. In this view, we created a very simple and plain MongoDB aggregation for counting recipes belonging to each cuisine. The rest is all Django. We leverage the objects manager (MongoManager, in the models.py), convert the queryset into a list, and provide it to the render function, along with the template and the request.
The template (statistics.html, together with the other templates) is simple. We just need to display the cuisines and the corresponding numbers:
{% extends 'base.html' %}

{% block title %}Recipe Statistics{% endblock %}

{% block content %}
<div class="py-6">
    <h1 class="text-2xl font-bold mb-6">Recipe Statistics</h1>

    <div class="grid md:grid-cols-2 gap-8">
        <!-- Cuisine Statistics -->
        <div class="border rounded p-4">
            <h2 class="text-xl font-semibold mb-4">Recipes by Cuisine</h2>

            {% if cuisine_stats %}
            <ul>
                {% for item in cuisine_stats %}
                <li class="mb-2">
                    <span class="font-medium">{{ item.cuisine|default:"Unspecified" }}:</span>
                    {{ item.count }} recipe{% if item.count != 1 %}s{% endif %}
                </li>
                {% endfor %}
            </ul>
            {% else %}
            <p>No cuisine data available.</p>
            {% endif %}
        </div>


    </div>
</div>
{% endblock %}
Do not forget to hook the view up into the urls.py (the “local one”, not the topmost):
path("stats/", views.recipe_statistics, name="recipe_stats"),
To recap, the cookbook/recipes/urls.py should look like this, at this point:
from django.urls import path

from . import views

urlpatterns = [
    path("", views.index, name="index"),
    path("recipe/<str:recipe_id>/", views.recipe_detail, name="recipe_detail"),
    path("search/", views.recipe_search, name="recipe_search"),
    path("list/", views.recipe_list, name="recipe_list"),
    path("stats/", views.recipe_statistics, name="recipe_stats"),
Creating indexes
We haven’t created any search indexes for our recipes—it is time to do so. We will create two indexes: a vector search index and an Atlas index:


The recipe_vector_search is the following:
{
  "fields": [
    {
      "type": "vector",
      "path": "voyage_embedding",
      "numDimensions": 1024,
      "similarity": "cosine"
    }
  ]
}
The path is voyage_embedding since this is what we named our embedding field. The number of dimensions corresponds to the selected embedding and we chose the cosine distance as the similarity metric.
The other index that we will create is named default:
{
  "mappings": {
    "dynamic": false,
    "fields": {
      "instructions": {
        "type": "string",
        "indexOptions": "offsets",
        "store": true,
        "norms": "include"
      },
      "ingredients": {
        "type": "string",
        "indexOptions": "offsets",
        "store": true,
        "norms": "include",
        "multi": {
          "ingredients": {
            "type": "string",
            "indexOptions": "offsets",
            "store": true,
            "norms": "include"
          }
        }
      },
      "title": {
        "type": "string",
        "indexOptions": "offsets",
        "store": true,
        "norms": "include"
      }
    }
  }
}
This index covers the recipe title, instructions, and ingredients. Notice the indexOptions key: When we create a text index with the "offsets" option, MongoDB stores additional information about where each indexed term appears in the indexed text. This additional positional data enables more advanced text search capabilities, particularly for phrase matching, proximity searches, and finding terms that appear close to each other in the text. This option does increase the index size but provides more powerful text search capabilities.
Let us now begin with a function that will perform the vector search. In a more serious project, this function would not live inside the views.py, but in this case, we will leave it there for simplicity:
def perform_vector_search(query_text, limit=10, num_candidates=None):
    if num_candidates is None:
    num_candidates = limit * 3

    try:
        # Generate embedding for the search query
        vo = voyageai.Client()  # Uses VOYAGE_API_KEY from environment
        query_embedding = vo.embed(
            [query_text], model="voyage-lite-01-instruct", input_type="query"
        ).embeddings[0]

        # Use Django's raw_aggregate to perform vector search
        results = Recipe.objects.raw_aggregate([
            {
                "$vectorSearch": {
                    "index": "recipe_vector_index",
                    "path": "voyage_embedding",
                    "queryVector": query_embedding,
                    "numCandidates": num_candidates,
                    "limit": limit,
                }
            },
            {
                "$project": {
                    "_id": 1,
                    "title": 1,
                    "ingredients": 1,
                    "instructions": 1,
                    "features": 1,
                    "score": {"$meta": "vectorSearchScore"},
                }
            },
        ])

        # Format the results - accessing attributes directly
        recipes = []
        for recipe in results:
            try:
                # Try direct attribute access first
                recipe_dict = {
                    "id": str(recipe.id),
                    "title": recipe.title,
                    "ingredients": recipe.ingredients,
                    "instructions": getattr(recipe, "instructions", ""),
                    "features": getattr(recipe, "features", {}),
                    "similarity_score": getattr(recipe, "score", 0),
                }
                recipes.append(recipe_dict)
            except Exception as e:
                print(f"Error formatting recipe: {str(e)}")
        return recipes

    except Exception as e:
        print(f"Error in vector search: {str(e)}")
        return []
In order for this function to work, we need to add some imports at the top of the views.py file and enable the Voyage AI embeddings. At the top of the views.py file, add the following:
import voyageai
from bson import ObjectId
from bson.errors import InvalidId
from django.http import Http404
from django.shortcuts import get_object_or_404, render
from dotenv import load_dotenv

from .models import Recipe

load_dotenv()
Remember, the query needs to be converted into numbers/embeddings using the same embeddings model used to create the embeddings for the recipes. Otherwise, it will not work. At the top of the views.py file, we imported the dotenv library that allows us to access the Voyage AI API key.
The rest is really just an ordinary MongoDB vector search. We specify the name of the vector index, the path (voyage_embedding), and some options. The vector search has to be the first entry in the aggregation pipeline. After that, we just add a project stage in which we add the score—how close the result is to the search query.
Finally, the results are just formatted and returned as a list of dictionaries. This function is not a view. It is a helper that we will use in the actual view.
Let's see the view function:
def ingredient_vector_search(request):
    """
    View for searching recipes by ingredients using vector search
    """
    query = request.GET.get("query", "")
    results = []

    if query:
        ingredient_query = f"Ingredients: {query}"
        results = perform_vector_search(ingredient_query, limit=10)

    context = {"query": query, "results": results}
    return render(request, "vector_search.html", context)
The bulk of the work is done in the vector search function. this view just leverages it and passes the results to a template. Let’s create the template vector_search.html, alongside the others:
{% extends 'base.html' %}

{% block title %}Ingredient Vector Search{% endblock %}

{% block content %}
<div class="py-4">
    <h1 class="text-2xl font-bold mb-4">Search Recipes by Ingredients</h1>

    <form method="GET" action="{% url 'ingredient_search' %}" class="mb-6">
        <div class="flex">
            <input type="text" name="query" placeholder="Enter ingredients (e.g., chicken, garlic, lemon)"
                value="{{ query }}" class="px-4 py-2 border rounded-l flex-grow">
            <button type="submit" class="bg-blue-600 text-white px-6 py-2 rounded-r hover:bg-blue-700 transition">
                Search
            </button>
        </div>
        <p class="text-gray-600 text-sm mt-2">Uses AI-powered vector search to find recipes with similar ingredients</p>
    </form>

    {% if query %}
    <h2 class="text-lg font-semibold mb-4">Results for "{{ query }}"</h2>

    {% if results %}
    <div class="space-y-6">
        {% for recipe in results %}
        <div class="border rounded-lg p-4 shadow hover:shadow-md transition">
            <h3 class="text-xl font-semibold mb-2">{{ recipe.title }}</h3>
            <div class="mb-3">
                <p class="text-sm text-gray-600">Similarity: {{ recipe.similarity_score|floatformat:2 }}</p>
            </div>
            <div class="mb-3">
                <h4 class="font-medium mb-1">Ingredients:</h4>
                <ul class="list-disc pl-5">
                    {% for ingredient in recipe.ingredients %}
                    <li>{{ ingredient }}</li>
                    {% endfor %}
                </ul>
            </div>
            <a href="{% url 'recipe_detail' recipe.id %}" class="text-blue-600 hover:underline">View full recipe</a>
        </div>
        {% endfor %}
    </div>
    {% else %}
    <p class="text-gray-600">No recipes found matching your ingredients.</p>
    {% endif %}
    {% endif %}
</div>
{% endblock %}

And let’s add it to the urls.py:
    path(
        "ingredient-search/", views.ingredient_vector_search, name="ingredient_search"
    ),

The final code (in the repository) contains a very similar search function and view for an Atlas search that performs fuzzy matching. If you type “corrot” instead of “carrot”, you will get the correct results. Fuzzy search is a powerful technique in information retrieval that allows users to find relevant results even when their query contains typos, misspellings, or slight variations from the target content.
The function is extracted from the view in the same way it was done for the vector search. This would allow us to reuse much of the templates—for instance, one template for all pages that display some type of results list and even a single view function (or class-based view!) which takes the type of search as a parameter, but this is left to the reader as an exercise in Django-ing.
Integrating an LLM for a personalized experience
For the final part of this recipe application, we will create a simple view for suggesting meals based on the ingredients a user has at hand. By implementing a couple of simple prompts for Claude Haiku, we will leverage the vector search results and ask the LLM to provide suggestions based on the recipes. Any LLM model could be used in this case, and for local prototyping, even a locally run LLM would be more than enough. We are not adding some great value really, just showcasing how to stitch the parts together.
A more thorough approach would include a hybrid search—combining results from an Atlas search and a vector search and integrating all the results together, maybe running them through a re-ranker (also provided by Voyage AI) and crafting sophisticated prompts through prompt engineering techniques.
The possibilities are virtually unlimited. Django provides the rock-solid web framework foundation, while the MongoDB integration allows for rich and complex queries and AI-powered solutions.
Let’s see a simple function that uses Claude Haiku to provide suggestions. At the top of the views.py file, add the imports needed for the Anthropic client:
from anthropic import Anthropic
and read the API key:
ANTHROPIC_API_KEY = os.getenv("ANTHROPIC_API_KEY")
While Voyage AI reads the API key automatically, Anthropic’s client does not, so the previous explicit statement is mandatory. The function, which should reside in a separate file, just like our search functions, will stay inside the views.py file for simplicity:
def get_claude_suggestions(user_ingredients, similar_recipes, max_suggestions=4):
    """
    Get meal suggestions from Claude based on available ingredients and similar recipes

    Args:
        user_ingredients (list): List of ingredients provided by the user
        similar_recipes (list): List of similar recipes found by vector search
        max_suggestions (int): Maximum number of suggestions to return

    Returns:
        list: List of meal suggestions from Claude
    """
    client = Anthropic(api_key=ANTHROPIC_API_KEY)

    # Prepare the prompt for Claude
    prompt = f"""I have these ingredients: {", ".join(user_ingredients)}


Based on these ingredients, I need `{max_suggestions}` meal suggestions.
Here are some similar recipes from my database that might help you:

    {json.dumps(similar_recipes, indent=2)}

For each suggestion, please:
1. Provide a recipe name
2. List the ingredients I have that can be used
3. Suggest substitutions for any missing ingredients
4. Give a brief description of how to prepare it
5. Mention difficulty level (easy, medium, hard)

Be friendly, practical, and focus on using what I have available with minimal extra ingredients.
Keep your answer concise and focused on the meal suggestions.
"""

    # Call Claude API
    response = client.messages.create(
        model="claude-3-haiku-20240307",
        max_tokens=1500,
        temperature=0.7,
        system="You are a helpful cooking assistant that provides meal suggestions based on available ingredients.",
        messages=[{"role": "user", "content": prompt}],
    )

    # Extract and parse suggestions
    suggestions_text = response.content[0].text

    # Split the suggestions - we'll assume each suggestion starts with a recipe name and number
    raw_suggestions = []
    current_suggestion = ""

    for line in suggestions_text.split("\n"):
        # Check if this line starts a new suggestion
        if line.strip() and (
            line.strip()[0].isdigit() and line.strip()[1:3] in [". ", ") "]
        ):
            if current_suggestion:
                raw_suggestions.append(current_suggestion.strip())
            current_suggestion = line
        else:
            current_suggestion += "\n" + line

    # Add the last suggestion
    if current_suggestion:
        raw_suggestions.append(current_suggestion.strip())

    # Limit to max_suggestions
    return raw_suggestions[:max_suggestions]
The function is a bit long, but it essentially works on a list of recipes. Those will be provided by the vector search and a list of user-provided ingredients. After getting the response from the Anthropic API, the function wraps it into a list (raw_suggestions) and returns the list.
The view function that will use the get_claude_suggestions() function and operate on the HTTP request is the following:
def ai_meal_suggestions(request):
    """
    View that combines vector search with Claude AI to suggest meals
    based on user-provided ingredients
    """
    query = request.GET.get("ingredients", "")
    suggestions = []
    error_message = None

    if query:
        try:
            # Clean up the input - split by commas and strip whitespace
            ingredients_list = [ing.strip() for ing in query.split(",") if ing.strip()]
            ingredients_text = ", ".join(ingredients_list)

            # Perform vector search to find similar recipes
            search_query = f"Ingredients: {ingredients_text}"
            similar_recipes = perform_vector_search(search_query, limit=10)

            if similar_recipes:
                # Format recipe data for Claude
                recipes_data = []
                for recipe in similar_recipes:
                    recipes_data.append({
                        "title": recipe.get("title", ""),
                        "ingredients": recipe.get("ingredients", []),
                        "score": recipe.get("similarity_score", 0),
                        "id": recipe.get("id", ""),
                    })

                # Call Claude API for meal suggestions
                suggestions = get_claude_suggestions(ingredients_list, recipes_data)
            else:
                error_message = "No similar recipes found for the provided ingredients."

        except Exception as e:
            error_message = f"An error occurred: {str(e)}"

    context = {
        "ingredients": query,
        "suggestions": suggestions,
        "error_message": error_message,
    }

    return render(request, "ai_suggestions.html", context)
The previous function is really just a wrapper for the Claude suggestions that needs improvement, but it gets the job done. The template for this last view is named ai_suggestions.html:
{% extends 'base.html' %}

{% block title %}AI Meal Suggestions{% endblock %}

{% block content %}
<div class="py-4">
    <h1 class="text-2xl font-bold mb-4">AI Meal Suggestions</h1>
    <p class="mb-4">Enter the ingredients you have available, separated by commas. Our AI will suggest meals you can
        make!</p>

    <form method="GET" action="{% url 'ai_meal_suggestions' %}" class="mb-8">
        <div class="mb-4">
            <label for="ingredients" class="block text-sm font-medium text-gray-700 mb-1">Your Ingredients:</label>
            <textarea id="ingredients" name="ingredients" rows="3"
                placeholder="e.g., chicken, garlic, onion, rice, bell pepper"
                class="w-full px-4 py-2 border rounded focus:ring-blue-500 focus:border-blue-500">{{ ingredients }}</textarea>
        </div>
        <button type="submit"
            class="bg-blue-600 text-white px-6 py-2 rounded hover:bg-blue-700 transition">
            Get Meal Suggestions
        </button>
    </form>

    {% if error_message %}
    <div class="bg-red-50 border border-red-200 text-red-700 px-4 py-3 rounded mb-6">
        {{ error_message }}
    </div>
    {% endif %}

    {% if suggestions %}
    <h2 class="text-xl font-semibold mb-4">Suggested Meals with Your Ingredients</h2>

    <div class="space-y-6">
        {% for suggestion in suggestions %}
        <div class="bg-white border rounded-lg p-5 shadow">
            {{ suggestion|linebreaks }}

        </div>
        {% endfor %}
    </div>

    <div class="mt-8 p-4 bg-blue-50 rounded">
        <p class="text-sm text-gray-600">
            <strong>Note:</strong> These suggestions are generated by AI based on your provided ingredients and similar
            recipes in our database.
            You may need to adjust quantities or cooking techniques based on your preferences.
        </p>
    </div>
    {% endif %}
</div>
{% endblock %}
With all the pieces now in place, we are ready to integrate everything in a final /cookbook/recipes/urls.py file:
from django.urls import path

from . import views

urlpatterns = [
    path("", views.index, name="index"),
    path("top/", views.top_recipes, name="top_recipes"),
    path("recipe/<str:recipe_id>/", views.recipe_detail, name="recipe_detail"),
    path("stats/", views.recipe_statistics, name="recipe_stats"),
    path(
        "ingredient-search/", views.ingredient_vector_search, name="ingredient_search"
    ),
    path("fuzzy-search/", views.fuzzy_search, name="fuzzy_search"),
    path("ai-suggestions/", views.ai_meal_suggestions, name="ai_meal_suggestions"),
]
And edit the base.html file to include a nice sidebar with all the links to the views that we have created:
<!doctype html>
<html lang="en">
<head>
<meta charset="UTF-8" />
<meta name="viewport" content="width=device-width, initial-scale=1.0" />
<title>{% block title %}Django MongoDB Backend Recipes{% endblock %}</title>
<script src="https://unpkg.com/@tailwindcss/browser@4"></script>
{% block extra_css %}{% endblock %}
</head>
<body class="flex flex-col min-h-screen bg-gray-50">
<!-- Mobile Header - Only shown on small screens -->
<header class="bg-blue-600 text-white py-3 px-4 md:hidden">
<div class="flex justify-between items-center">
<a href="{% url 'index' %}" class="text-xl font-bold">Django MongoDB Recipes</a>
<button id="mobile-menu-button" class="text-white focus:outline-none">
<svg class="h-6 w-6" fill="none" stroke="currentColor" viewBox="0 0 24 24"
xmlns="http://www.w3.org/2000/svg">
<path stroke-linecap="round" stroke-linejoin="round" stroke-width="2" d="M4 6h16M4 12h16M4 18h16">
</path>
</svg>
</button>
</div>
<!-- Mobile Menu -->
<div id="mobile-menu" class="hidden mt-3">
<a href="{% url 'index' %}" class="block py-2 hover:bg-blue-700 rounded px-2">Home</a>
<a href="{% url 'recipe_search' %}" class="block py-2 hover:bg-blue-700 rounded px-2">Search</a>
<a href="{% url 'recipe_list' %}" class="block py-2 hover:bg-blue-700 rounded px-2">All Recipes</a>
<a href="{% url 'recipe_stats' %}" class="block py-2 hover:bg-blue-700 rounded px-2">Statistics</a>
</div>
</header>
<div class="flex flex-grow">
<!-- Left Sidebar -->
<aside class="w-64 bg-gray-800 text-white hidden md:block">
<div class="p-4 sticky top-0">
<!-- Logo/Title Area -->
<div class="mb-6 pb-4 border-b border-gray-700">
<a href="{% url 'index' %}" class="text-xl font-bold block">
MongoDB Recipes
</a>
</div>
<h3 class="text-lg font-semibold mb-4 border-b border-gray-700 pb-2">Navigation</h3>
<ul class="space-y-2">
<li>
<a href="{% url 'index' %}" class="block py-2 px-4 hover:bg-gray-700 rounded transition">
Home
</a>
</li>
<li>
<a href="{% url 'recipe_search' %}"
class="block py-2 px-4 hover:bg-gray-700 rounded transition">
Search Recipes
</a>
</li>
<li>
<a href="{% url 'recipe_list' %}" class="block py-2 px-4 hover:bg-gray-700 rounded transition">
All Recipes
</a>
</li>
<li>
<a href="{% url 'recipe_stats' %}" class="block py-2 px-4 hover:bg-gray-700 rounded transition">
Recipe Statistics
</a>
</li>
<li>
<a href="{% url 'ingredient_search' %}"
class="block py-2 px-4 hover:bg-gray-700 rounded transition">
Ingredient Search
</a>
</li>
<li>
<a href="{% url 'atlas_search' %}" class="block py-2 px-4 hover:bg-gray-700 rounded transition">
Atlas Search
</a>
</li>
<li>
<a href="{% url 'ai_meal_suggestions' %}"
class="block py-2 px-4 hover:bg-gray-700 rounded transition">
AI Meal Suggestions
</a>
</li>
</ul>
</div>
</aside>
<!-- Main Content -->
<main class="flex-grow px-4 py-6">
<div class="container mx-auto">
{% block content %}
<h1 class="text-3xl font-bold underline">Hello world!</h1>
{% endblock %}
</div>
</main>
</div>
<!-- Footer -->
<footer class="bg-gray-800 text-white py-6">
<div class="container mx-auto px-4">
<div class="flex flex-col md:flex-row justify-between items-center">
<div class="mb-4 md:mb-0">
<p>© {% now "Y" %} Django + MongoDB = Backend <3 </p>
</div>
</div>
</div>
</footer>
<script>
// Toggle mobile menu
document.getElementById('mobile-menu-button').addEventListener('click', function () {
const menu = document.getElementById('mobile-menu');
menu.classList.toggle('hidden');
});
</script>
{% block extra_js %}{% endblock %}
</body>
</html>
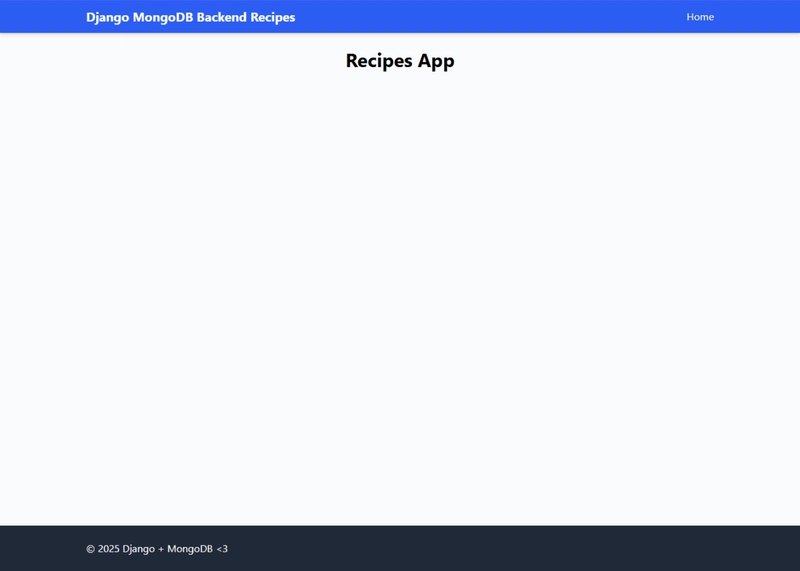
The final application should look more or less like this:

Conclusion
In this simple yet practical project, we have learned how to combine Django, a premier web framework, and MongoDB, the most popular and feature-rich document database, with the use of the Django MongoDB Backend. We have seen how to quickly map our business logic through Django views, how to model data with Django models, and the MongoDB-specific features provided by the backend. We have seen how to quickly draw modular templates and integrate third-party services, such as the Claude API.
View the GitHub repo with the code.
There is much more functionality that can be added to this project. Django provides excellent user management, so the processes of registering and logging users, for instance, are streamlined and battle-tested. It is worth noting that the most popular Django authentication package / Django AllAuth is on top of the priorities list when it comes to integrations with the Backend.
The Django MongoDB Backend is an official and deep integration. Rather than using workarounds, the team took a deep approach to understand Django's framework internals, hooking directly into Django's lookup operators and making MongoDB's aggregation framework match Django's query structure. The team plans to integrate and ensure compatibility with some of the most sought Django packages—Django Filter and Django REST Framework, to name a couple.
An excellent basis for rapid AI-driven web applications, the Django MongoDB Backend is a sign of exciting times to come in the everchanging and fast-paced world at the intersection of AI and web development!


Top comments (1)
i am unable to see recipies in my mongodbcluster under cookbook database. Instead recipe_features is being shown. why so?