CentOS Installation on Virtual Box

1.Download Virtual Box and install it on you Host Operating System:
https://www.virtualbox.org/wiki/Downloads
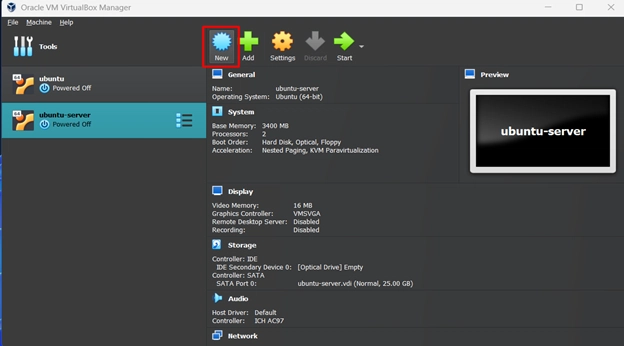
2.Open the Virtual Box and click “New” button.
3.Fill up the fields and click “Next” Button
- • Name: For identifying your OS, put the name which OS you are installing.
- • Folder: In this filed refers to where you install the OS system files
- • ISO Image: Refers to select .iso image from your computer.
- • Skip the Unattended Installation

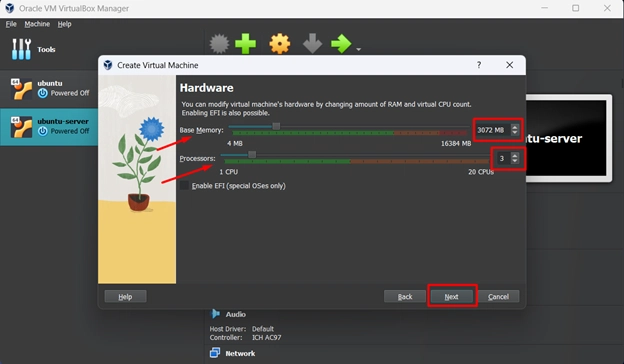
4.In this section provide the Base Memory (RAM) and Processors then click “Next” button.
5.In this section provide the storage for the installation and click “Next” button.

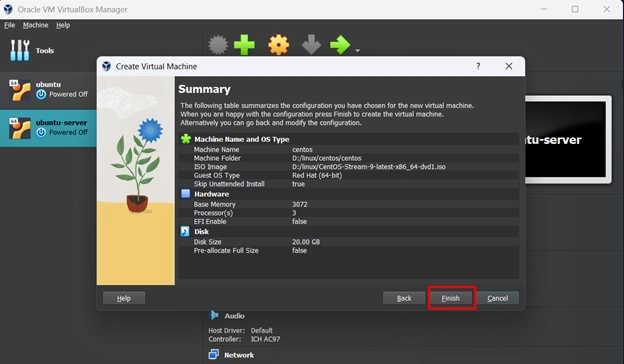
6.You will find the total system configuration summary then “Finish” button.
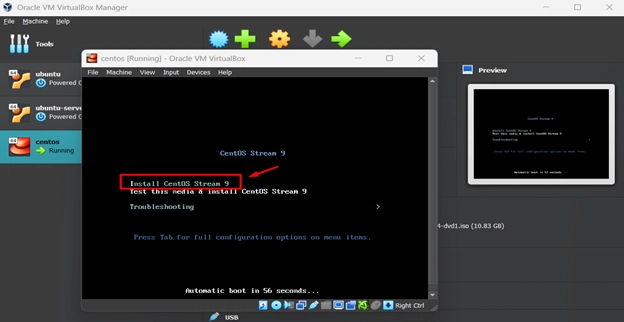
7.Select the centos and click on the “Start” button.

8.An installation window will be open, and it will automatically select “Install CentOS Stream 9” and press “Enter” It will start booting the system.
9.Select Language and press “Continue” button.

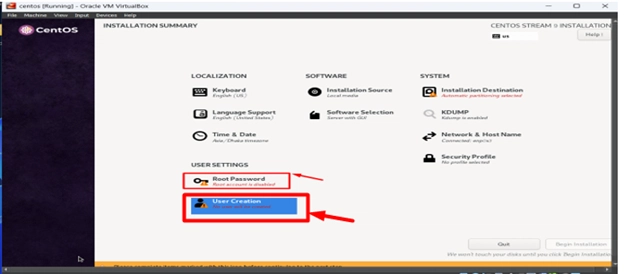
10.Installation summary page will be opened. And click on Root Password option.
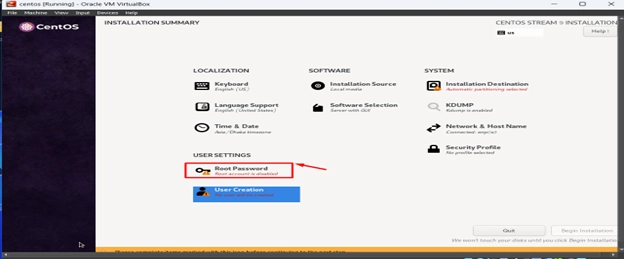
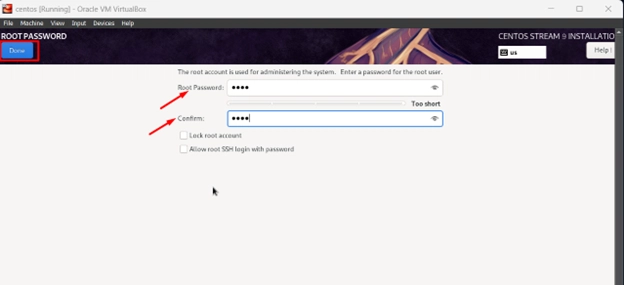
11.Provide the root password and default username will be root. click on the “Done” button.
12.Click on the User Creation option for create a user.
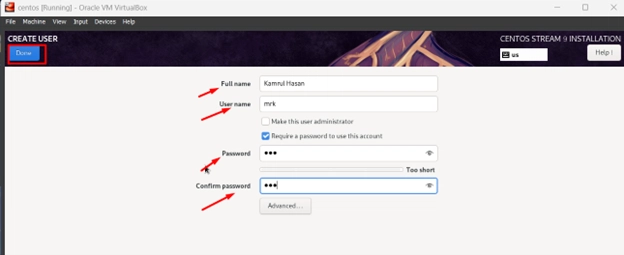
13.Fill up the fields such as Full name, Username, Password and click on “Done” button.
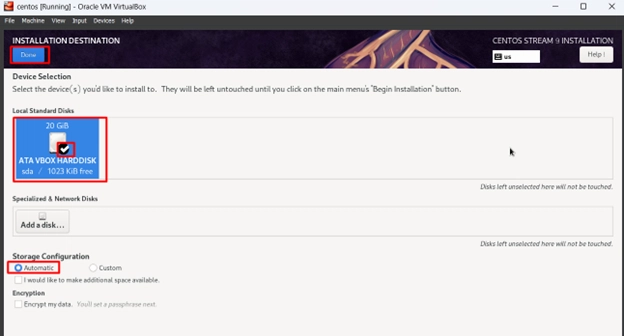
14.Now set up the automatic storage disk. Click on the “Installation Destination”.

15.Select the and check mark the “Local Standard Disks”, radio button will be automatic. And finally click on “Done” button.
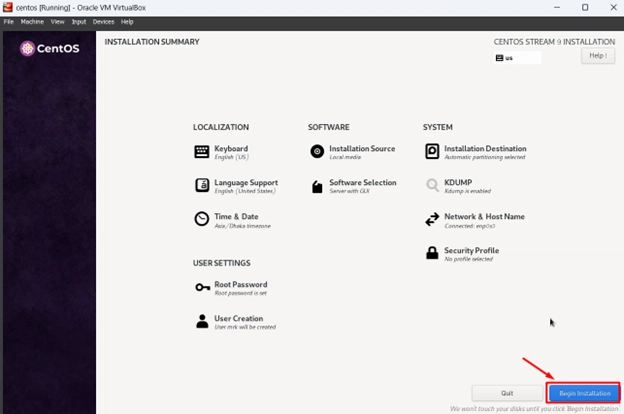
16.Now click on the “Begin Installation” button.
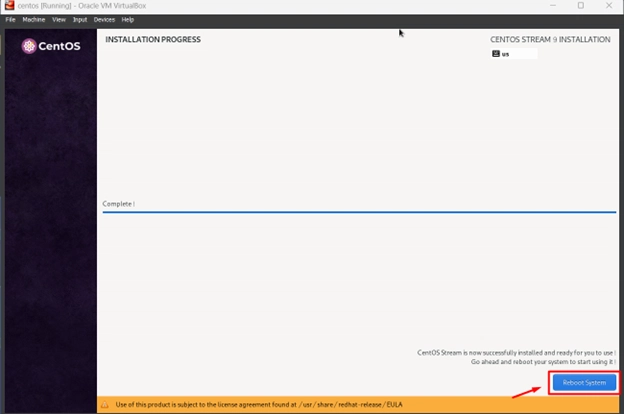
17.Installation process will start, and I will take some time according to your pc configurations. Keep patience and wait until this part is completed.

18.After Installation process complete click on the “Reboot System” button.
19.Finally, you will get the login page for entering the centos system. Click on the Name Shown on the screen.

20.Type passwordwhich you already created for this user.

21.Now click on No Thanks or You can Take Tour.

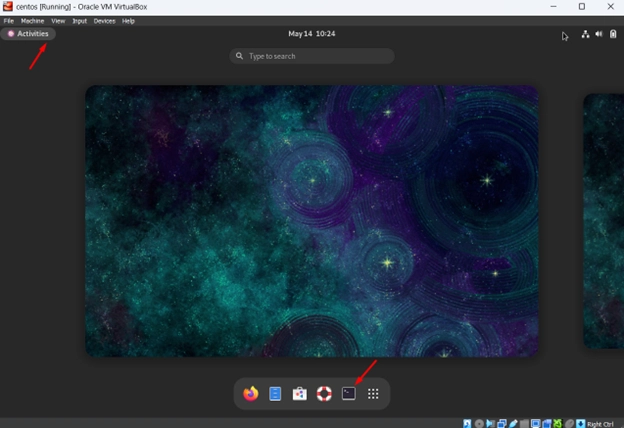
22.You will get the final window for the CentOS. Click Activities and then click Terminal Icon.
23.Now you can update your system by following the steps below on the screenshot. You can directly update as root user. Here you can see steps to update your system as a normal user.
Let apply this command:
`- sudo dnf update
- su – root
- usermod -aG wheel mrk
- su – mrk
- sudo dnf update`

Md. Kamrul Hasan
LinkedIn: https://linkedin.com/in/kamrul-dev
GitHub: https://github.com/kamrul-dev
Related keywords:
install CentOS VirtualBox,
CentOS VirtualBox tutorial,
CentOS 7 VirtualBox setup,
CentOS VirtualBox installation guide,
CentOS VirtualBox DevOps,
Kamrul Hasan DevOps Engineer,
DevOps tips by Kamrul Hasan,
Kamrul Hasan Docker tutorials,
Learn DevOps with Kamrul Hasan,
Kamrul Hasan automation expert,
Kamrul Hasan cloud and containers,
CI/CD pipelines by Kamrul Hasan,
Kamrul Hasan Kubernetes & Docker,


Top comments (0)