TL;DR
In this article, you will learn how to build an agent-native research canvas app that combines human-in-the-loop capabilities using Langraph, CopilotKit, and Tavily.
Before we jump in, here is what we will cover:
- What are AI agents?
- Building and visualizing a LangGraph AI agent using LangGraph Studio
- Building UI for a LangGraph AI agent using CopilotKit
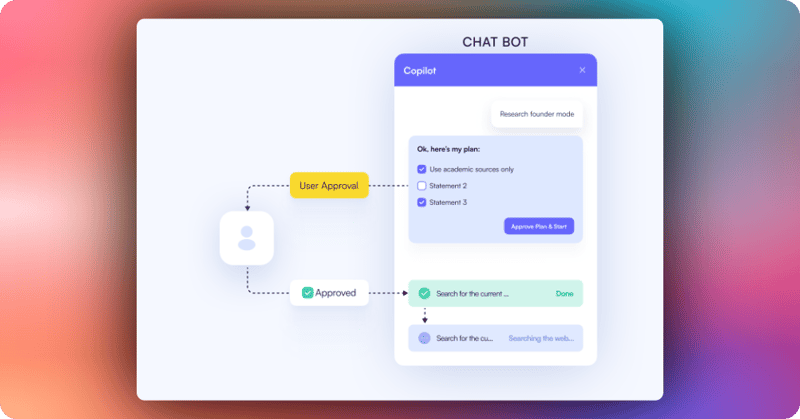
Here’s a preview of the application we’ll be building.
What are AI Agents?
In simpler terms, AI Agents are autonomous software programs that can perform tasks, make decisions, and interact with their environment using artificial intelligence.
In this context, they are systems that can conduct research, process information, and engage with humans during execution to ensure reliability and trustworthiness.
You can read more about AI Agents here on CopilotKit docs.
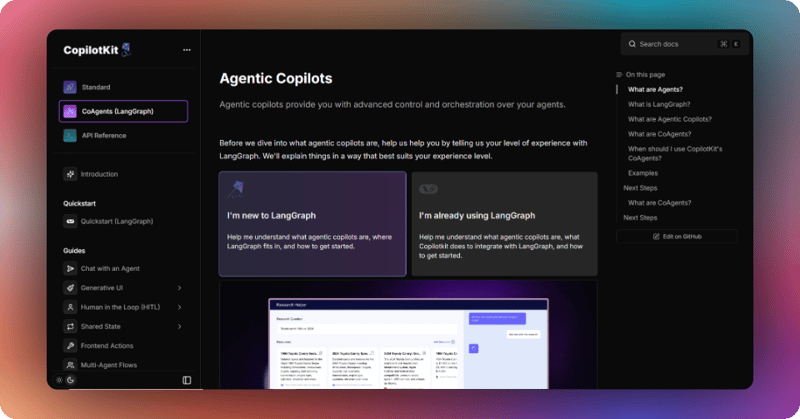
What is CopilotKit
CopilotKit is an open-source, full-stack framework for building user-interactive agents and copilots. It enables your agents to take control of your application, communicate what it's doing, and generate a completely custom UI.
Check out CopilotKit's GitHub ⭐️
Prerequisites
To fully understand this tutorial, you need to have a basic understanding of React or Next.js.
We'll also make use of the following:
- Python - a popular programming language for building AI agents with LangGraph; make sure it is installed on your computer.
- LangGraph - a framework for creating and deploying AI agents. It also helps to define the control flows and actions to be performed by the agent.
- OpenAI API Key - to enable us to perform various tasks using the GPT models; for this tutorial, ensure you have access to the GPT-4 model.
- Tavily AI - a search engine that enables AI agents to conduct research and access real-time knowledge within the application.
- CopilotKit - an open-source copilot framework for building custom AI chatbots, in-app AI agents, and text areas.
- Docker - a platform for developing, shipping, and running applications in containers.
Building and Visualizing a LangGraph AI agent
In this section, you will learn how to build and start a LangGraph agent using Docker and visualize its workflow using LangGraph Studio.
Let’s jump in.
First, start by cloning the agent-native research canvas app repository, which contains code for a Python-based Langraph agent:
git clone https://github.com/CopilotKit/open-research-ANA.git
The repository contains two folders: the agent and the front end. To start the agent, navigate to the agent directory.
cd agent
Then install all the agent dependencies using pip.
pip install -r requirements.txt
Next, create a .env file in the agent directory. Then add OpenAI, Tavily, and LangSmith API keys into the environment variables.
OPENAI_API_KEY=your_key
TAVILY_API_KEY=your_key
LANGSMITH_API_KEY=your_key
If you open the agent/graph.py file, it defines a MasterAgent class that conducts a research workflow.
It uses a directed graph (StateGraph) to manage states and transitions between the LangGraph AI agent nodes, tool execution, and human feedback.
The workflow is designed to assist in generating research reports by gathering data, proposing outlines, and writing sections—all while allowing human feedback via a front-end integration using CopilotKit.
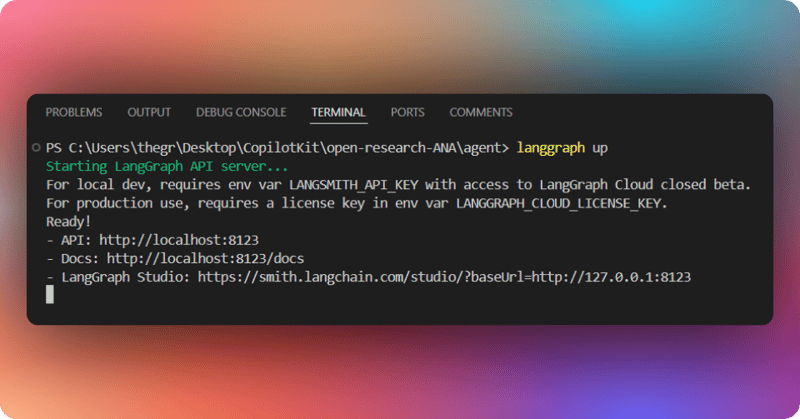
To start the Langraph AI agent, open the Docker app and run the following command to start the agent.
langgraph up
Once the LangGraph API server has started, navigate to the LangGraph Studio using the LangGraph Studio link provided. Note the API URL from the output (e.g., http://localhost:8123). We will use it to connect the agent to the front end using CopilotKit Cloud.
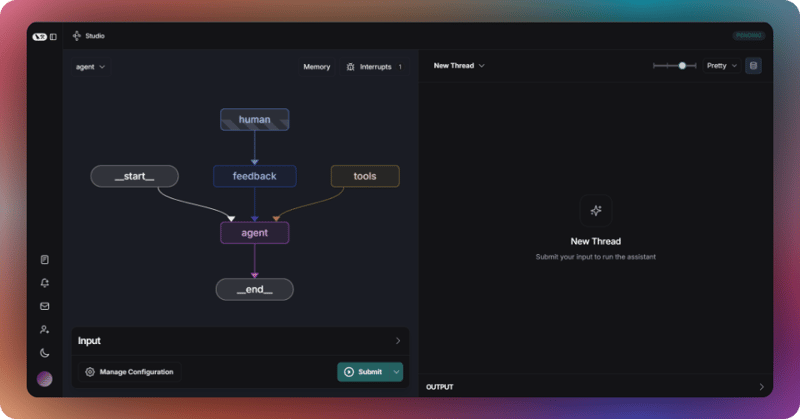
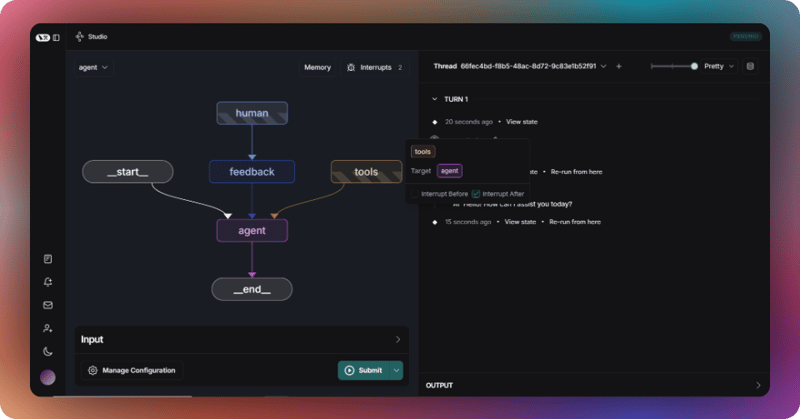
After that, the LangGraph agent will open on the LangGraph studio, and you can visualize it, as shown below.
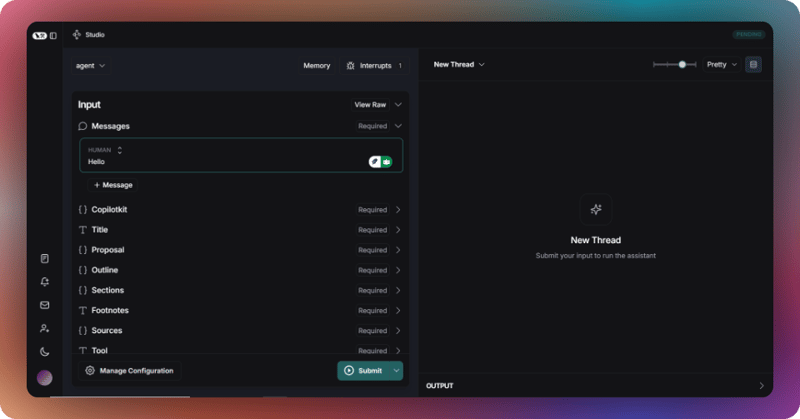
To test the LangGraph agent, add a message to the messages state variable and click the Submit button.
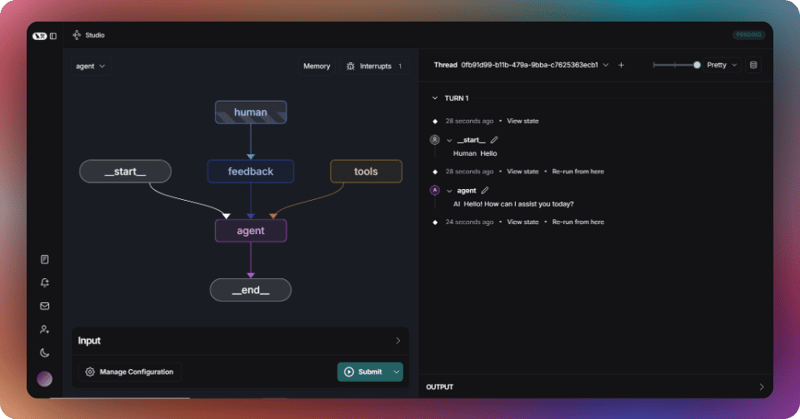
The agent will then process the input by following the defined workflow through the connected nodes and respond to your message in a thread, as shown below.
Before we continue, let’s talk about a key concept in agentic copilots called Human-in-the-Loop (HITL). HITL allows agents to request human input or approval during execution in order to make AI systems reliable and trustworthy.
You can read more about Human-in-the-Loop here on CopilotKit Docs.
In this case, you can add HITL to the agent by clicking one of the nodes and marking the Interrupt After checkbox, as shown below.
Then add another message, such as “research about AI models,” to the messages state variable and click the Submit button. The agent will start researching AI models, and once it is done, it will ask you to review the sections and provide your feedback or any specific changes you would like to make, as shown below.
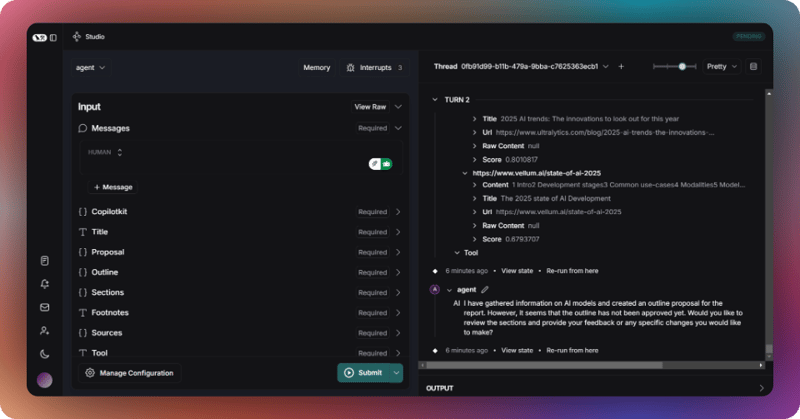
Add a “yes” message to the messages state variable and click the Submit button. The agent will process the message and provide you with the outline proposal for the report on AI models. Then it will ask you if you would like to approve the outline or if there are any changes you would like to make, as shown below.
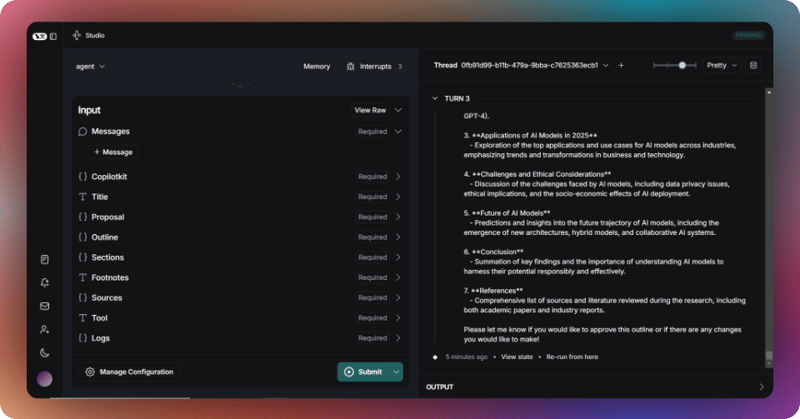
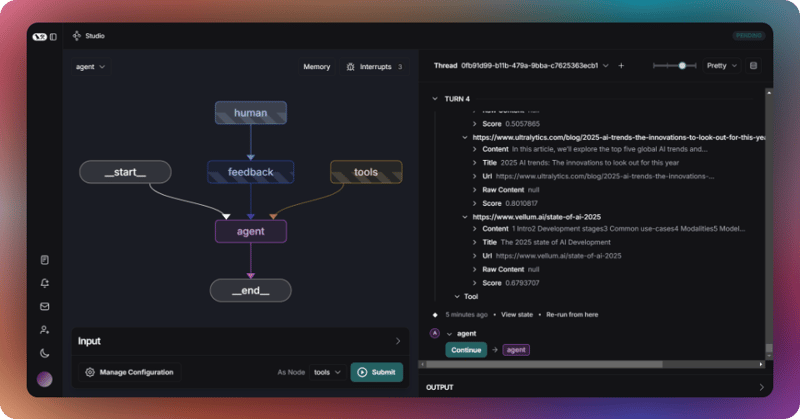
Reply with the “I would like to approve the outline” message and click the submit button. Then the agent will compile a report on AI models grouped in different sections and finish the research process, as shown below.
Now that we have learned how to visualize and test a LangGraph AI agent using LangGraph Studio, let’s see how we can add a frontend UI to interact with it.
Building UI for LangGraph Agent using CopilotKit
In this section, you will learn how to connect your LangGraph AI agent to the CopilotKit frontend UI using the CopilotKit cloud.
Let’s get started.
Step 1: Create a tunnel for a LangGraph AI agent
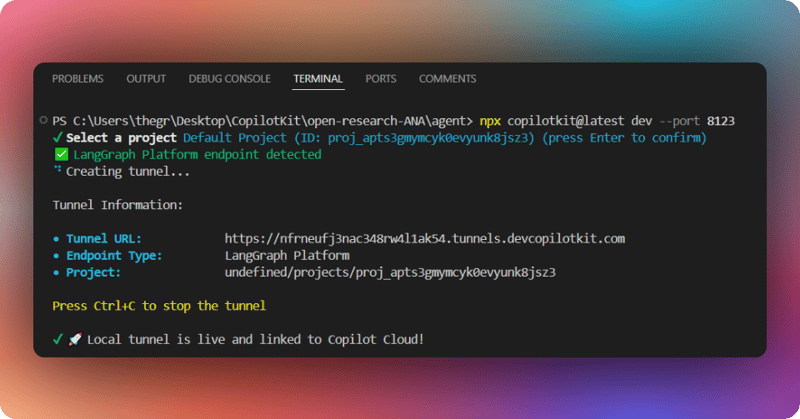
To create a tunnel to the LangGraph AI agent, use the command below so Copilot Cloud can connect to it. Remember the API URL I told you to note when starting the agent; use the port number provided. In my case, the port number is 8123.
npx copilotkit@latest dev --port 8123
Select a project, and the tunnel should be live and connected to Copilot Cloud, as shown below.
Then navigate to the frontend folder.
cd frontend
After that, install the frontend dependencies using pnpm.
pnpm install
Next, create a .env file in the frontend directory. Then add OpenAI, Copilot Cloud, and LangSmith API keys into the environment variables.
OPENAI_API_KEY=your_openai_key
LANGSMITH_API_KEY=your_langsmith_key
NEXT_PUBLIC_COPILOT_CLOUD_API_KEY=your_copilot_cloud_key
Then start the app using the command below.
pnpm run dev
Navigate to http://localhost:3000/ and you should see the LangGraph AI agent frontend up and running
Let’s now see how to build UI for the LangGraph AI agent using CopilotKit.
Step 2: Setup CopilotKit Provider
To set up the CopilotKit Provider, the <CopilotKit> component must wrap the Copilot-aware parts of your application. For most use cases, it's appropriate to wrap the CopilotKit provider around the entire app, e.g., in your layout.tsx, as shown below in the frontend/src/app/layout.tsx file
import { CopilotKit } from "@copilotkit/react-core";

export default function RootLayout({
    children,
}: Readonly<{
    children: React.ReactNode;
}>) {
    return (
        <html lang="en" className="h-full">
        {/* CopilotKit component for integrating an AI agent */}
            <body className={`${lato.variable} ${noto.className} antialiased h-full`}>
                <CopilotKit
                        {/* Pass the Copilot Cloud API key from environment variables */}
                    publicApiKey={process.env.NEXT_PUBLIC_COPILOT_CLOUD_API_KEY}
                    {/* Disable the development console (set to true for debugging) */}
                    showDevConsole={false}
                    {/* Specify the LangGraph agent name */}
                    agent="agent"
                >
                    <TooltipProvider>
                        <ResearchProvider>
                            {children}
                        </ResearchProvider>
                    </TooltipProvider>
                </CopilotKit>
            </body>
        </html>
    );
}
Step 3: Choose a Copilot UI
To set up your Copilot UI, first import the default styles in your root component (typically layout.tsx).
import "@copilotkit/react-ui/styles.css";
Copilot UI ships with a number of built-in UI patterns; choose whichever one you like from CopilotPopup, CopilotSidebar, CopilotChat, to Headless UI.
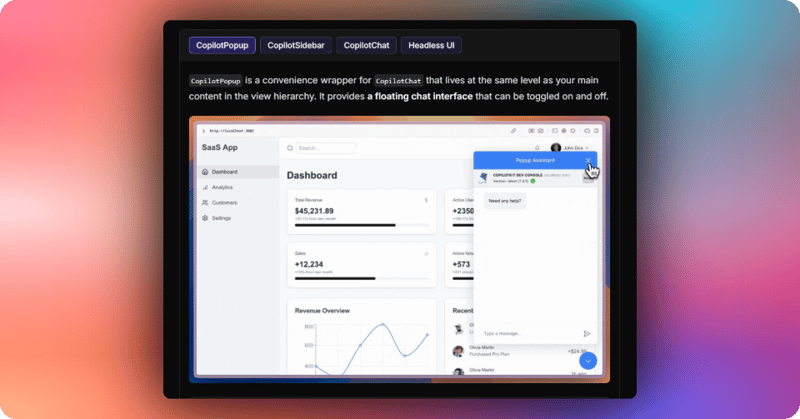
In this case, we will use CopilotChat defined in the src/components/chat.tsx file.
// Indicate that this component runs on the client side (Next.js directive)
'use client'

// Import the CopilotChat component from the CopilotKit React UI library
import { CopilotChat } from "@copilotkit/react-ui";
// Import constant values for chat configuration from a local library file
import { INITIAL_MESSAGE, MAIN_CHAT_INSTRUCTIONS, MAIN_CHAT_TITLE } from "@/lib/consts";
// @ts-expect-error -- ignore: Suppresses TypeScript error for missing/incorrect type definition
import { CopilotChatProps } from "@copilotkit/react-ui/dist/components/chat/Chat";

// Define the Chat component, accepting props typed as CopilotChatProps
export default function Chat(props: CopilotChatProps) {
  return (
      // Render the CopilotChat component with custom configuration
      <CopilotChat
          instructions={MAIN_CHAT_INSTRUCTIONS} // Pass predefined instructions for the chat behavior
          labels={{
              title: MAIN_CHAT_TITLE, // Set the chat window title from constants
              initial: INITIAL_MESSAGE, // Set the initial message displayed in the chat
          }}
          className="h-full w-full font-noto" // Apply custom CSS classes for full height/width and Noto font
          {...props} // Spread additional props passed to the component (e.g., overrides or customizations)
      />
  );
}
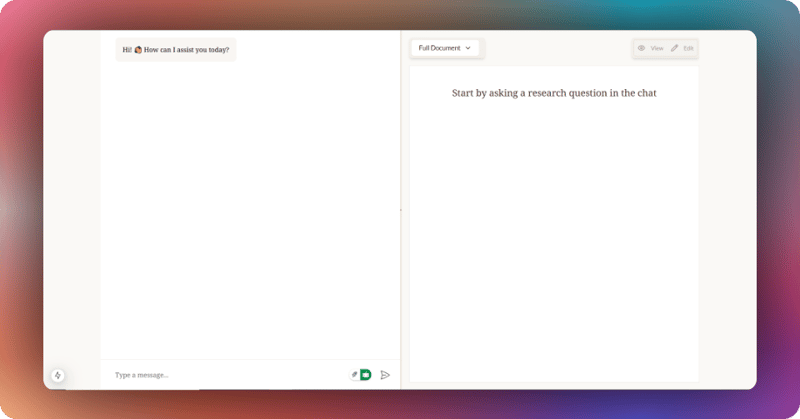
The chat component is then imported and used in the src/app/page.tsx file. The chat is then rendered on the frontend UI, as shown below.
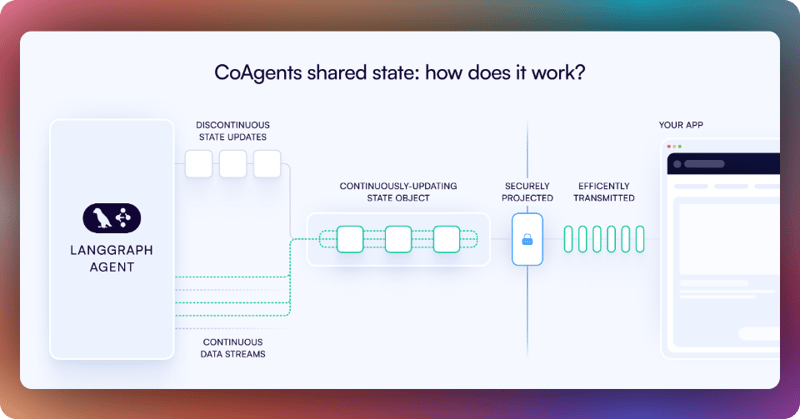
Step 4: Creating a shared state between your UI and LangGraph AI agent
CoAgents maintain a shared state that seamlessly connects your UI with the agent's execution. This shared state system allows you to:
- Display the agent's current progress and intermediate results
- Update the agent's state through UI interactions
- React to state changes in real-time across your application
You can learn more about CoAgents’ shared state here on CopilotKit docs.
To create a shared state between your UI and LangGraph AI agent, first, you need to define the agent state and emit it to the front end, as shown in the agent/graph.py file.
    # Async method to handle tool execution and update research state
    async def tool_node(self, state: ResearchState, config: RunnableConfig):
        # Customize config to disable message emission to frontend during tool execution
        config = copilotkit_customize_config(config, emit_messages=False)
        msgs = []  # List to store tool messages
        tool_state = {}  # Dictionary to store updated state after tool execution
        # Process each tool call from the last message (assumed to be an AIMessage)
        for tool_call in state["messages"][-1].tool_calls:
            tool = self.tools_by_name[tool_call["name"]]  # Lookup tool by name
            # Simplify messages structure temporarily for tool access
            state['messages'] = {'HumanMessage' if type(message) == HumanMessage else 'AIMessage': message.content for message in state['messages']}
            tool_call["args"]["state"] = state  # Inject state into tool arguments
            # Run the tool asynchronously and get updated state and message
            new_state, tool_msg = await tool.ainvoke(tool_call["args"])
            tool_call["args"]["state"] = None  # Clear state from args after execution
            # Append tool result as a ToolMessage
            msgs.append(ToolMessage(content=tool_msg, name=tool_call["name"], tool_call_id=tool_call["id"]))
            # Build updated tool state with research data
            tool_state = {
                "title": new_state.get("title", ""),
                "outline": new_state.get("outline", {}),
                "sections": new_state.get("sections", []),
                "sources": new_state.get("sources", {}),
                "proposal": new_state.get("proposal", {}),
                "logs": new_state.get("logs", []),
                "tool": new_state.get("tool", {}),
                "messages": msgs
            }
            # Emit updated state to frontend
            await copilotkit_emit_state(config, tool_state)

        return tool_state  # Return the updated state
Then use the CopilotKit useCoAgent hook to share the LangGraph AI agent state with your frontend UI in the src/components/research-context.tsx file. The useCoAgent hook allows you to share state bidirectionally between your application and the agent.
// Indicate that this component runs on the client side (Next.js directive)
'use client'

// Import React utilities for context, state, and effects
import { createContext, useContext, useState, ReactNode, useEffect } from 'react';
// Import the ResearchState type from a shared library
import type { ResearchState } from '@/lib/types';
// Import CopilotKit's hook for managing agent state
import { useCoAgent } from "@copilotkit/react-core";
// Import a custom hook for interacting with local storage
import useLocalStorage from "@/lib/hooks/useLocalStorage";

// Define the shape of the context value
interface ResearchContextType {
    state: ResearchState; // The current research state
    setResearchState: (newState: ResearchState | ((prevState: ResearchState) => ResearchState)) => void; // Function to update research state
    sourcesModalOpen: boolean; // Boolean to toggle the sources modal
    setSourcesModalOpen: (open: boolean) => void; // Function to set the modal state
    runAgent: () => void; // Function to trigger the agent execution
}

// Create a context for sharing research state, initially undefined
const ResearchContext = createContext<ResearchContextType | undefined>(undefined);

// Define the ResearchProvider component to wrap children with context
export function ResearchProvider({ children }: { children: ReactNode }) {
    // State for controlling the visibility of a sources modal
    const [sourcesModalOpen, setSourcesModalOpen] = useState<boolean>(false);
    // Use CopilotKit's useCoAgent hook to manage agent state and execution
    const { state: coAgentState, setState: setCoAgentsState, run } = useCoAgent<ResearchState>({
        name: 'agent', // Name of the agent (matches backend configuration)
        initialState: {}, // Initial empty state for the agent
    });
    // Use custom hook to manage research state in local storage, initially null
    // @ts-expect-error -- force null: Suppresses TypeScript error for null initial value
    const [localStorageState, setLocalStorageState] = useLocalStorage<ResearchState>('research', null);

    // Effect to synchronize agent state and local storage
    useEffect(() => {
        // Check if agent state or local storage is empty
        const coAgentsStateEmpty = Object.keys(coAgentState).length < 1;
        const localStorageStateEmpty = localStorageState == null || Object.keys(localStorageState).length < 1;

        // If local storage has data but agent state is empty, initialize agent state
        if (!localStorageStateEmpty && coAgentsStateEmpty) {
            setCoAgentsState(localStorageState);
            return;
        }
        // If agent state has data but local storage is empty, save to local storage
        if (!coAgentsStateEmpty && localStorageStateEmpty) {
            setLocalStorageState(coAgentState);
            return;
        }
        // If both exist but differ, update local storage with agent state
        if (!localStorageStateEmpty && !coAgentsStateEmpty && JSON.stringify(localStorageState) !== JSON.stringify(coAgentState)) {
            setLocalStorageState(coAgentState);
            return;
        }
    }, [coAgentState, localStorageState, setCoAgentsState, setLocalStorageState]); // Dependencies for the effect

    // Provide context value to children
    return (
        <ResearchContext.Provider value={{
            state: coAgentState, // Current research state from CopilotKit
            setResearchState: setCoAgentsState as ResearchContextType['setResearchState'], // Setter for research state (cast for type compatibility)
            setSourcesModalOpen, // Function to toggle sources modal
            sourcesModalOpen, // Current modal state
            runAgent: run // Function to run the agent
        }}>
            {children} // Render child components within the provider
        </ResearchContext.Provider>
    );
}

// Custom hook to access the research context
export function useResearch() {
    // Get the context value
    const context = useContext(ResearchContext);
    // Throw an error if used outside of ResearchProvider
    if (context === undefined) {
        throw new Error('useResearch must be used within a ResearchProvider');
    }
    return context; // Return the context value
}
Next, render the agent's state in the chat UI. This is useful for informing the user about the agent's state in a more in-context way. To do this, you can use the useCoAgentStateRender hook in the src/app/page.tsx file.
// ...
import {useCoAgentStateRender} from "@copilotkit/react-core";
// ...

export default function HomePage() {
    // ...
  useCoAgentStateRender<ResearchState>(
    {
      name: "agent",
      render: ({ state }) => {
        if (state.logs?.length > 0) {
          return <Progress logs={state.logs} />;
        }
        return null;
      },
    },
    [researchState]
  );
//   ...
}
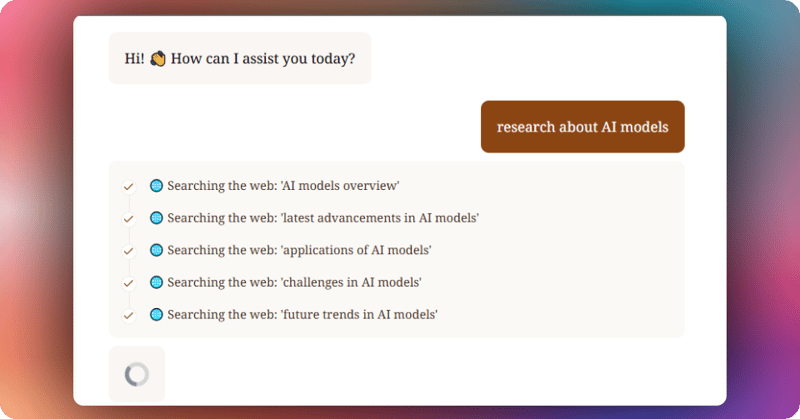
Then navigate to http://localhost:3000/, add “research AI models” to the chat, and press “Enter.” You should see the LangGraph AI agent state rendered in the chat UI, as shown below.
Step 5: Adding Human-in-the-loop breakpoint in your frontend UI
To allow the LangGraph agent to request human input or approval during execution in the chat UI, use the CopiloKit useCopilotKitAction hook named review_proposal in the src/app/page.tsx file.
// ...
import { useCopilotAction } from "@copilotkit/react-core";
// ...

export default function HomePage() {
  // ...
  // Define a custom action using the useCopilotAction hook from CopilotKit
  useCopilotAction({
    name: "review_proposal", // Unique name for the action
    description:
      "Prompt the user to review structure proposal. Right after proposal generation", // Description of the action's purpose
    available: "remote", // Indicates the action is available remotely (e.g., triggered by a backend or agent)
    parameters: [], // No parameters required for this action
    // @ts-expect-error -- null element is legit: Suppresses TypeScript error for returning null
    renderAndWaitForResponse: (
      { respond, status } // Function to render UI and wait for user response
    ) =>
      status !== "complete" ? ( // Check if the action is still in progress
        <ProposalViewer // Render a custom ProposalViewer component
          onSubmit={(
            approved,
            proposal // Callback when the user submits their review
          ) =>
            respond?.({
              // Send the response back to CopilotKit
              ...proposal, // Spread the proposal object (assumed to contain structure details)
              approved, // Add the approval status (true/false)
            })
          }
        />
      ) : null, // Return null when the action is complete (hides the UI)
  });
  //   ...
}
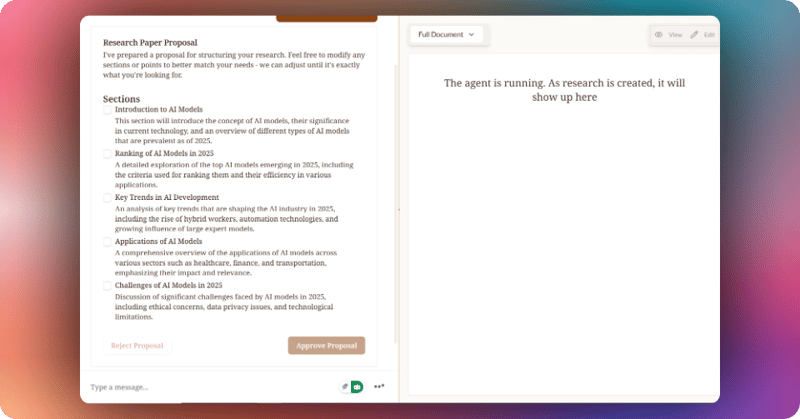
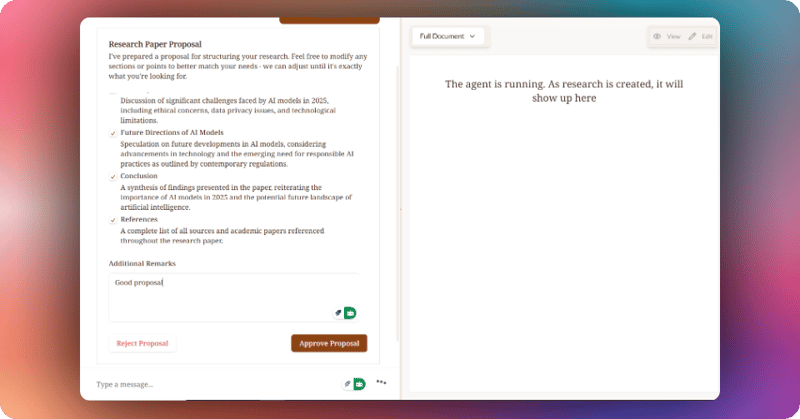
Then navigate to http://localhost:3000/. Once the LangGraph agent is done researching about AI models, it will ask you to approve the proposal, as shown below.
Select the sections you want, add some remarks, and click the Approve Proposal button. The LangGraph AI agent will start writing the research report on AI models.
Step 6: Streaming LangGraph AI agent Response in the UI
To stream the research report content, use the useStreamingContent hook defined in the src/lib/hooks/useStreamingContent.ts file in the src/app/page.tsx file.
import { useStreamingContent } from "@/lib/hooks/useStreamingContent";

export default function HomePage() {
  // ...
  const streamingSection = useStreamingContent(researchState);
  //   ...
  return (
    // ...
    {/* Document Viewer */}
    <DocumentsView
    sections={sections ?? []}
    streamingSection={streamingSection}
    selectedSection={sections?.find((s) => s.id === selectedSectionId)}
    onSelectSection={setSelectedSectionId}
         />
    // ...
  )
}
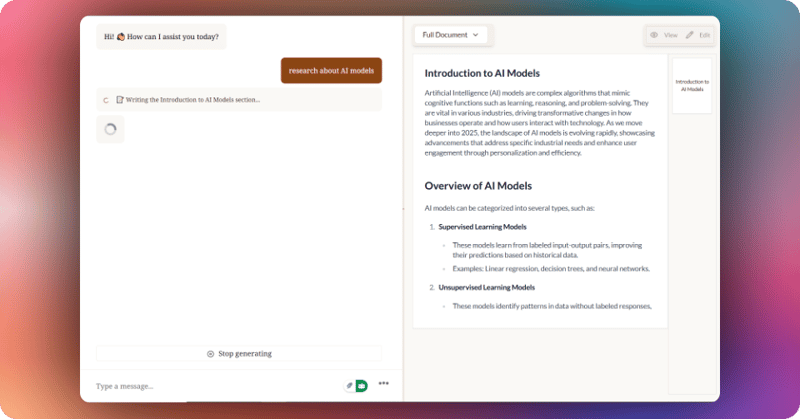
You should see the research content streaming on the right side, as shown below.
Conclusion
We covered a lot in this tutorial. I hope you learned how to build UI for an agentic copilot for your application with CopilotKit and also learned how to perform state changes in real-time and implement the human-in-the-loop concept.
Check out the full source code on GitHub here
Follow CopilotKit on Twitter and say hi, and if you'd like to build something cool, join the Discord community.


Top comments (43)
Awesome! 🔥
Thanks, Anmol.
I'm very familiar with LangGraph, LangChain, and LangSmith but hadn't heard of CopilotKit. I think this is going to save me!
Let me know how it turns out, Steven.
Hey Steven, I'm with the CopilotKit team and I would love to get your feedback when you start building!
This is a great guide! CopilotKit looks like a powerful tool for building AI agent UIs. Thanks for the clear explanation. Visit. personalized dog harness
I am happy to hear that, Ajay.
Hey Bonnie, thanks for such a detailed walkthrough with great visuals!
Thanks, Nathan.
I had fun working on this article.
Thanks for sharing!
You are welcome, Trent.
Nice!
Thanks, Morgan.
Nice UI
Thanks, Johny.
Easy to understand, good descriptive images, this is a great guide.
Thanks, John.
I've been saying this for a while, hoping CopilotKit expands to other agentic frameworks, particularly CrewAI. That's what my company uses but I really need this
The CopilotKit team has already released an EARLY ACCESS to start building with CrewAI!
I think @nathan_tarbert can add more to this.
Hey Ferguson, Bonnie is correct. We've released early access to CrewAI support and would love your feedback.
Please reach out to me on Twitter and I will give you access.
Great and insightful article! I really liked the way you explained building a UI for AI agents using LangGraph and CopilotKit. Thanks for sharing this detailed guide
I am happy to hear that you liked the article.
Some comments may only be visible to logged-in visitors. Sign in to view all comments.