Overview 📝
I've built a local MCP Server for Trello that's completely open source! This innovative server leverages the Model Context Protocol (MCP) to create a seamless bridge between your applications and Trello. Get ready to supercharge your workflow with these amazing capabilities:
- 📋 Managing boards and viewing their details
- 🗂️ Working with lists and cards
- 🆕 Creating and updating cards
- 🔄 Moving cards between lists
- 💬 Adding comments to cards
- 👥 Managing board members
To get started, you'll need:
Setup ⚙️
- 🧑💻 Clone the repository:
git clone https://github.com/r123singh/trello-mcp-server.git
- 📂 cd trello-mcp-server
- 🏗️ Create a virtual environment:
python -m venv venv
- ▶️ Activate the virtual environment:
source venv/bin/activate
- 📦 Install dependencies:
pip install -r requirements.txt
- 🔐 Configure your environment variables:
Create a
.envfile with:
TRELLO_API_KEY=your_trello_api_key
TRELLO_API_TOKEN=your_trello_token
- 🛠️ Configure MCP JSON:
Create a
mcp.jsonfile with:
{
  "mcpServers": {
    "trello": {
      "command": "{PATH_TO_DIRECTORY}\\trello-mcp-server\\venv\\Scripts\\python.exe",
      "args": [
        "{PATH_TO_DIRECTORY}\\trello-mcp-server\\server.py"
      ],
      "env": {
        "TRELLO_API_KEY": "your_trello_api_key",
        "TRELLO_API_TOKEN": "your_trello_token"
      }
    }
  }
}
Replace:
- 🗂️
{{PATH_TO_DIRECTORY}}with the absolute path to this directory (usepwdcommand) - 🔑 Add your API keys and tokens
To get Trello credentials:
- 🌐 Go to https://trello.com/app-key
- 📋 Copy the API Key
- 🔗 Generate a token by visiting: https://trello.com/1/authorize?expiration=never&scope=read,write,account&response_type=token&name=Server%20Token&key=YOUR_API_KEY
- (replace YOUR_API_KEY with your actual API key)
- 📝 Replace your_trello_api_key and your_trello_token in the config with these value
Available Tools 🛠️
The server provides the following tools for interacting with Trello:
- 📋 Get all boards
- 📑 Get board details
- 🗂️ Get lists in a board
- 🃏 Get cards in a list
- 🔍 Get card details
- 🆕 Create new cards
- ✏️ Update existing cards
- 🔄 Move cards between lists
- 💬 Add comments to cards
- 👥 Get board members
Usage 🚦
Now that you have the MCP server configured, you can use it in your applications. The server provides a natural language interface to interact with Trello through the available tools such as Cursor, Claude Desktop
Cursor AI 💻
- Open MCP settings in Cursor AI - File -> Settings -> MCP -> Enable MCP
- Add the following to your Cursor AI settings:
{
  "mcpServers": {
    "trello": {
      "command": "{PATH_TO_DIRECTORY}\\trello-mcp-server\\venv\\Scripts\\python.exe",
      "args": [
        "{PATH_TO_DIRECTORY}\\trello-mcp-server\\server.py"
      ],
      "env": {
        "TRELLO_API_KEY": "your_trello_api_key",
        "TRELLO_API_TOKEN": "your_trello_token"
      }
    }
  }
}
🔄 Restart Cursor AI
Use the following prompt to use the trello mcp server:
I need to create a new card named "Project planning" in Trello. 🃏

Claude Desktop 🖥️
- Open Claude Desktop. Go to File -> Settings -> Select developer tab -> Click on "Edit config"
- It will open location of config file in your default editor. It is named 'claude_desktop_config.json'. Open it.
- Add the following to the config:
{
  "mcpServers": {
    "trello": {
      "command": "{PATH_TO_DIRECTORY}\\trello-mcp-server\\venv\\Scripts\\python.exe",
      "args": [
        "{PATH_TO_DIRECTORY}\\trello-mcp-server\\server.py"
      ],
      "env": {
        "TRELLO_API_KEY": "your_trello_api_key",
        "TRELLO_API_TOKEN": "your_trello_token"
      }
    }
  }
}
The new mcp server should appear in the settings page with status "Running" or "Connected" ✅
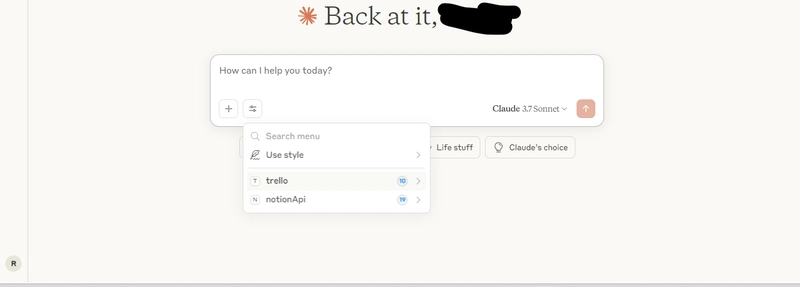
Close the settings page and go back to the chat. Select the 3 line icon just below the chat input box. It should display now "trello" in the list of available servers, clicking it will list all the tools available.
- Use the following prompt to create a new card:
I need to create a new card named "Sprint planning" in Trello. 🃏
- It will prompt initially to run the tool. Click on "Always run". It will create the card in Trello and return the link to the new card. 🔗
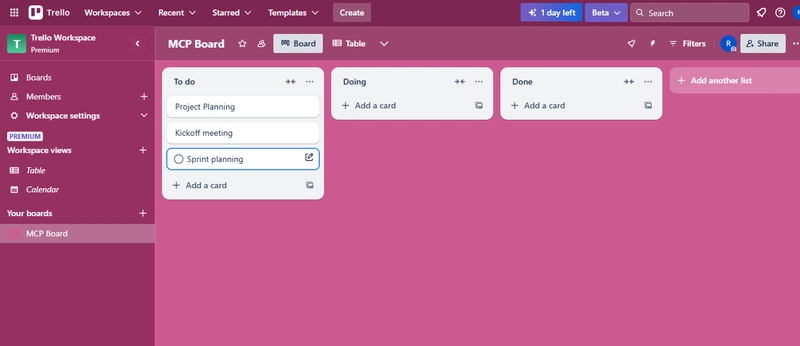

- You can now use the card id to update the card or move it to a different list.


Top comments (0)