
Keeping your app users up-to-date instantly is easier than ever with Stallion — a powerful tool for Over-the-Air (OTA) updates in React Native. Forget waiting for app store approvals; push updates directly to your users with zero friction. 🙌
This guide walks you through setting up Stallion and publishing your first OTA update.
🚀 Why Use Stallion?
✅ Built-in Testing Framework to validate updates before production
🔁 Switch Between App Versions without rebuilding native code
📦 Publish Bundles Instantly using Stallion CLI
📲 Apply Updates In-App using the Stallion SDK
🔄 Manual + Automatic Rollbacks with real-time rollback insights
📊 Detailed Analytics for update adoption and performance tracking
🏷️ Extensive Free Plan for indie devs and small teams
✅ Production-Ready and trusted by teams shipping millions of updates
🔧 Step 1: Set Up Your Stallion Account
To get started with Stallion, you'll first need to create a free account and set up your project.
✅ Create Your Stallion Account
- 👉 Go to the Stallion Dashboard
- Sign up or log in to your account.
🧱 Create a New Project
Once you're signed in, you'll be guided through the process of creating your first project.
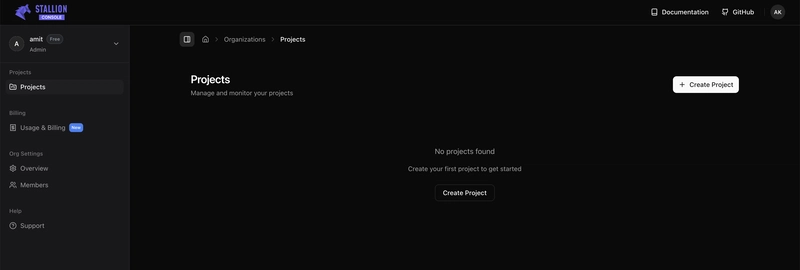
Dashboard View
You'll land on the dashboard after logging in:

Click “Create Project”
Hit the "Create Project" button to get started:
Fill in Your Project Details
Enter your project name and description, then click "Create":

Project Successfully Created
You'll now see your new project listed in the dashboard, Now Click on the project card to proceed.

🗂️ Create a New Bucket
Now, let’s set up a storage bucket for your project.
Bucket View – Click "Create Bucket"
Navigate to the Buckets section and click on "Create Bucket":

Create New Bucket
Fill in the necessary details to create your new bucket:

You're now ready to start integrating your application with Stallion! 🎉
📦 Step 2: Install the Stallion CLI
Install the CLI to interact with Stallion from your terminal.
# Using npm
npm install --save-dev stallion-cli

# Or using Yarn
yarn add -D stallion-cli
📲 Step 3: Install the Stallion SDK
Add the Stallion SDK to your React Native project:
# Using npm
npm install react-native-stallion

# Or using Yarn
yarn add react-native-stallion
Then, install CocoaPods for iOS:
npx pod-install
🧩 Step 4: Configure Native Projects
🤖 Android Configuration
ℹ️ For React Native < 0.76
In MainApplication.java, update getJSBundleFile:
// ...other imports
import com.stallion.Stallion;

public class MainApplication extends Application implements ReactApplication {
  // ...rest of the class
  @Override
  protected String getJSBundleFile() {
      return Stallion.getJSBundleFile(getApplicationContext());
  }
}
ℹ️ For React Native > 0.76
In MainApplication.kt, update the reactNativeHost:
// ...other imports
import com.stallion.Stallion

// ...other functions
override val reactNativeHost: ReactNativeHost =
  object : DefaultReactNativeHost(this) {
    override fun getPackages(): List<ReactPackage> =
      //other methods...

      override fun getJSBundleFile(): String? {
          return Stallion.getJSBundleFile(applicationContext)
      }
  }
🍎 iOS Configuration
ℹ️ For React Native < 0.76
In AppDelegate.mm, update the sourceURLForBridge method:
// ...other imports
#import "StallionModule.h"

@implementation AppDelegate
// ...other implemetations
- (NSURL *)sourceURLForBridge:(RCTBridge *)bridge
{
    #if DEBUG
      return [[RCTBundleURLProvider sharedSettings] jsBundleURLForBundleRoot:@"index"];
    #else
      return [StallionModule getBundleURL];
    #endif
}
ℹ️ For React Native > 0.76
In AppDelegate.swift, update the bundleURL() method:
// ...other imports
import react_native_stallion

// ...other functions
override func bundleURL() -> URL? {
    #if DEBUG
        RCTBundleURLProvider.sharedSettings().jsBundleURL(forBundleRoot: "index")
    #else
        StallionModule.getBundleURL()
    #endif
}
🔐 Step 5: Add Project ID and App Token
Add your Stallion credentials to platform-specific config files.
iOS (Info.plist):
Add below code on Info.plist file
<key>StallionProjectId</key>
<string>your_project_id</string>
<key>StallionAppToken</key>
<string>your_app_token</string>
Android (res/values/strings.xml):
Add below code on strings.xml file
<string name="StallionProjectId">your_project_id</string>
<string name="StallionAppToken">your_app_token</string>
You can generate your app token in the Stallion dashboard:
Click on Generate App Token button in order to get app token

🔍 Find your Project ID and App Token under Project Settings in the Stallion Dashboard.

🧵 Step 6: Wrap Your App Component
In your App.js or App.tsx, wrap your root component with the withStallion HOC:
import { withStallion } from 'react-native-stallion';
// rest of your code
export default withStallion(App);
📦 Step 7: Create a Release Build
Android:
# macOS
./gradlew assembleRelease

# Windows
gradlew.bat assembleRelease
iOS:
Use Xcode to archive and export a release build (IPA).
Install the build on a device or emulator to test.
🧪 Step 8: Make a Code Change
Modify your app’s logic or UI—for example, update some text—and save your changes.
🚚 Step 9: Publish the OTA Update
1. Login to Stallion CLI:
npx stallion login
This will open a browser window for authentication. Once logged in, copy and paste the token back into your terminal.
2. Publish the update:
Use the appropriate command below to publish your update for Android or iOS.
🤖 Android Command
npx stallion publish-bundle \
  --upload-path=orgname/project-name/bucket-name \
  --platform=android
🍎 iOS Command
npx stallion publish-bundle \
  --upload-path=orgname/project-name/bucket-name \
  --platform=ios
🔍 Replace orgname, project-name, and bucket-name with your actual values.
Or use "Copy Bundle Path" from the dashboard in order to get the orgname/project-name/bucket-name:

📤 Step 10: Promote and Release the Bundle
Follow these steps to promote your Android (and iOS) bundle from staging to production.
✅ Step 1: Access the Bundle Details
- Navigate to the Stallion Dashboard
- Click on the View Details button.

✅ Step 2: Open the Android Bundles Tab
- Click on the Android Bundles tab in the navigation bar.

✅ Step 3: Add Release Notes and Promote
- After clicking, a new box will appear.
- Enter your release notes.
- Click on Promote Bundle.

✅ Step 4: Select Target Version & Finalize Promotion
- In the Promote Bundle View, choose the target version.
- Add the release notes again.
- Click on Promote.

✅ Step 5: Manage the Release
- Once promoted, click on the Manage Release button.
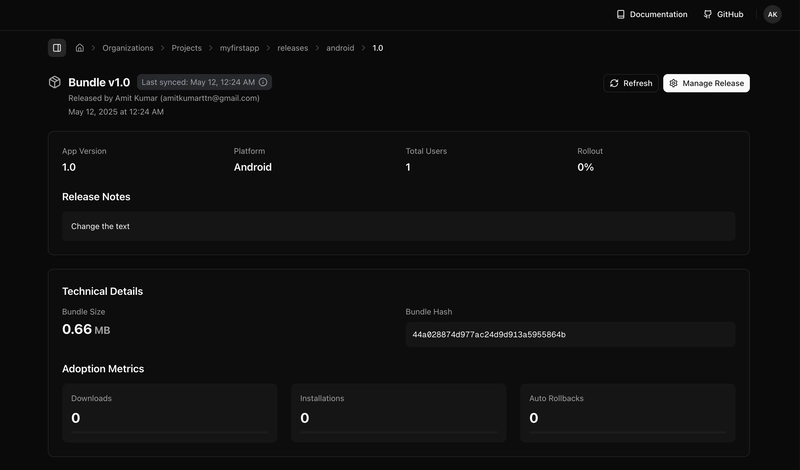
✅ Step 6: Publish to Production
- Add the release notes.
- Set rollout percentage to 100%.
- Click on Publish Changes.

🍎 The same steps should be followed for iOS as well.
🎉 All Done!
Your bundle has been successfully promoted and released.
- To view the latest changes in the app:
- Kill (close) the app completely, then
- Reopen the app to load the updated JS bundle.
- This ensures the latest changes are reflected properly.
🔁 If not, try staying in the app for at least a minute before closing it. Then reopen it — your changes should now be visible.
✅ Final Thoughts
Stallion makes the OTA update process seamless and efficient. With minimal setup and a powerful CLI, you can roll out bug fixes, feature updates, or UI tweaks instantly—keeping your app fresh and users happy.
Ready to streamline your React Native deployment?
Start using Stallion today and revolutionize your mobile development workflow.

Top comments (1)
This tool is just Awesome ! Best OTA solution till date by far